Search for answers or browse our knowledge base.
How to Add Ecommerce to a Gallery
To enable Ecommerce to your gallery, you'll first need to attach your pricelist, and then select 'Enable Ecommerce' when inserting your gallery through the Insert Gallery Window.
1) ATTACH A PRICELIST TO GALLERY
After you are finished adding your items to your pricelist, click ‘Save’. Now go to Gallery >> Manage Galleries > [select your gallery you'd like to set your images for sale] . Next to ‘Pricelists’ select the pricelist you’d like your entire / majority of your images/products to have. By default each image/product in the gallery will have the selection ‘Use gallery’s pricelist’. You can adjust this to be set to ‘None (not for sale)’ or attach a different pricelist. This is helpful for galleries that have a mix of products that have been sold or are not for sale, or images that are available at different sizes.
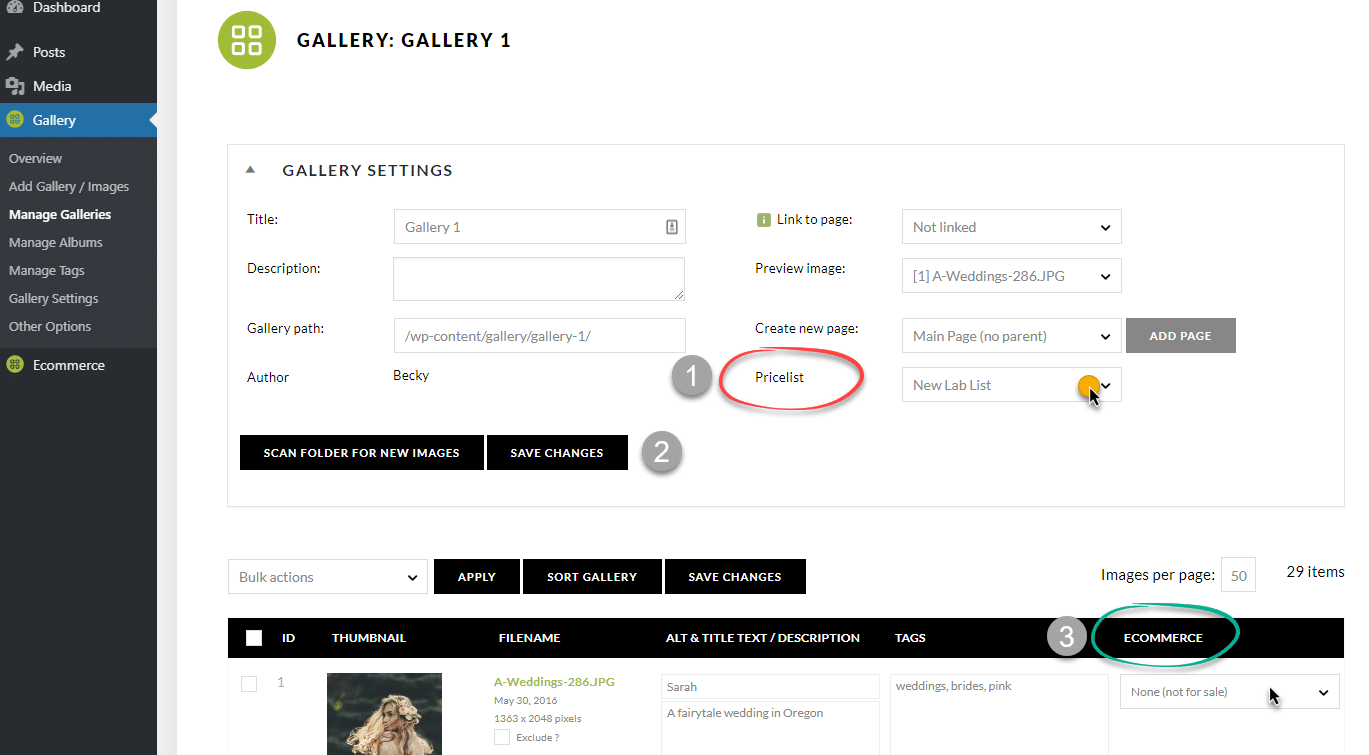
2) ENABLE ECOMMERCE
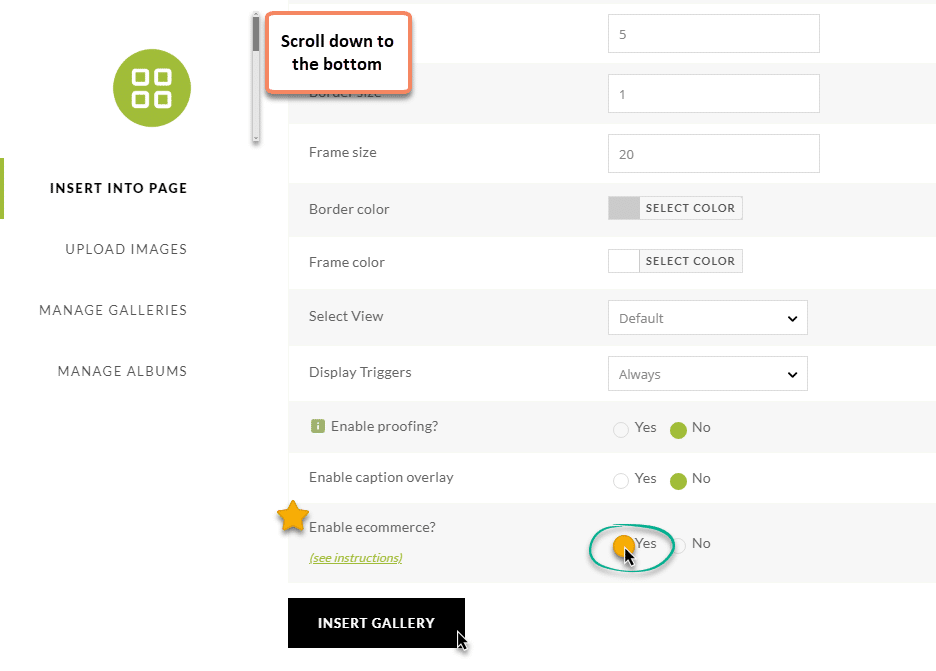
Open the Add Gallery Window to edit or insert your gallery to your page. Select any gallery type you wish to display your gallery of images. Under the 'customize display' tab, select 'Yes' next to 'Enable Ecommerce' and then click 'save' to insert your gallery.
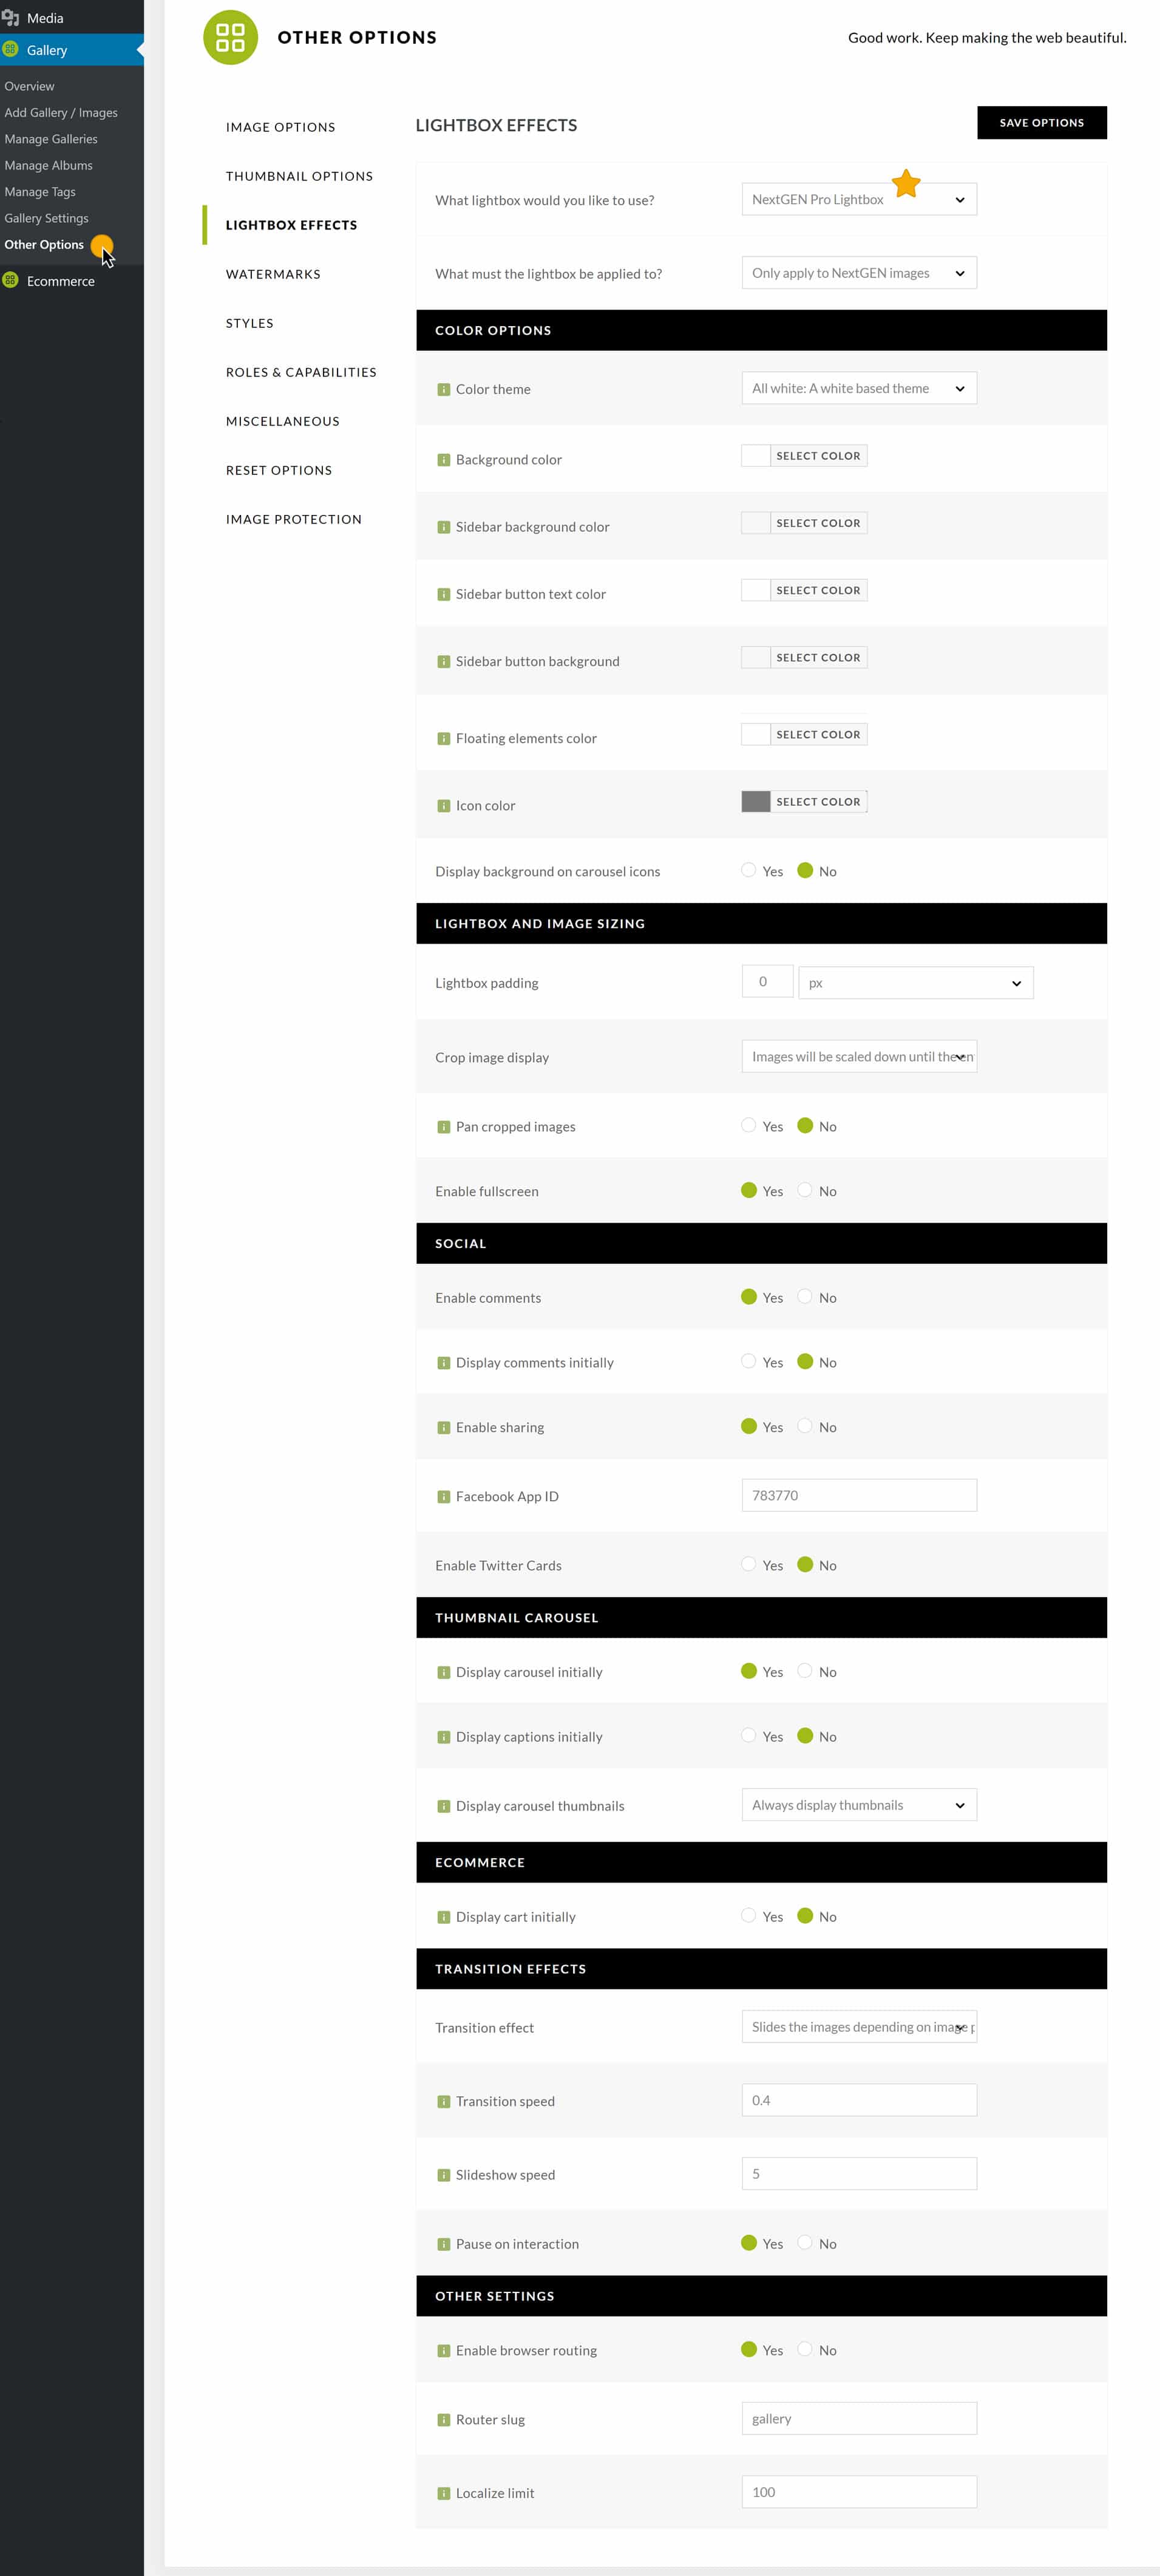
*IMPORTANT NOTE - You'll need to have the NextGEN Pro Lightbox activated to display the Ecommerce option in your gallery. Make sure that is set as your active Lightbox Effect under Gallery > Other Options > Lightbox Effects.
ECOMMERCE DISPLAY
Once you successfully enable Ecommerce on your gallery, on the front end you'll see a shopping cart icon in the bottom right of your gallery:
The icon will also appear in the bottom left of your Pro Lightbox display:
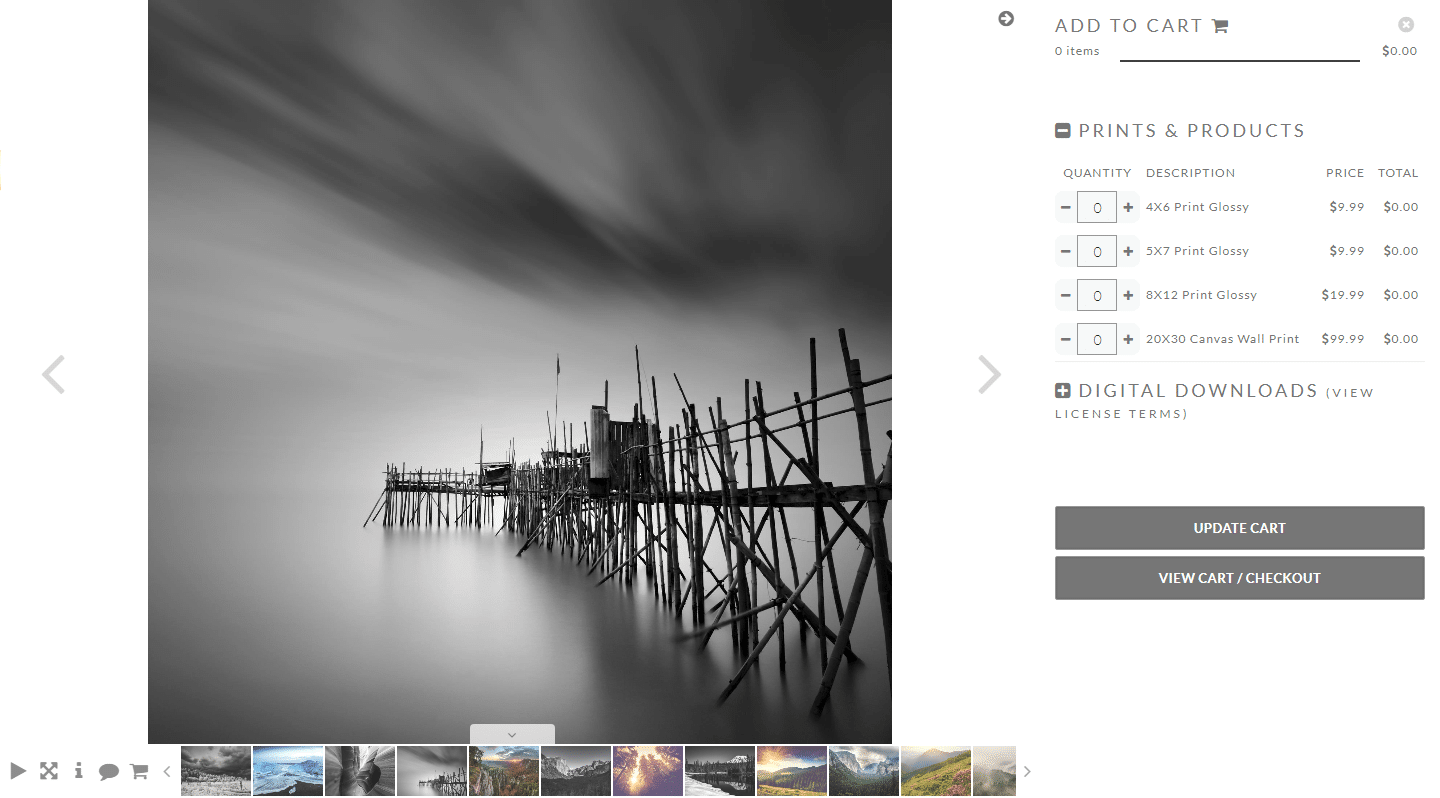
When selected, the Ecommerce sidebar will appear to the right where visitors can select what options they'd like to add to cart. Set the quantity, click 'update cart' to add items to cart. The total will automatically update in the top right of the sidebar. When they are finished they can select 'x items' in the top left or 'View Cart / Checkout' button. Clicking either of those two links will redirect them to their cart:
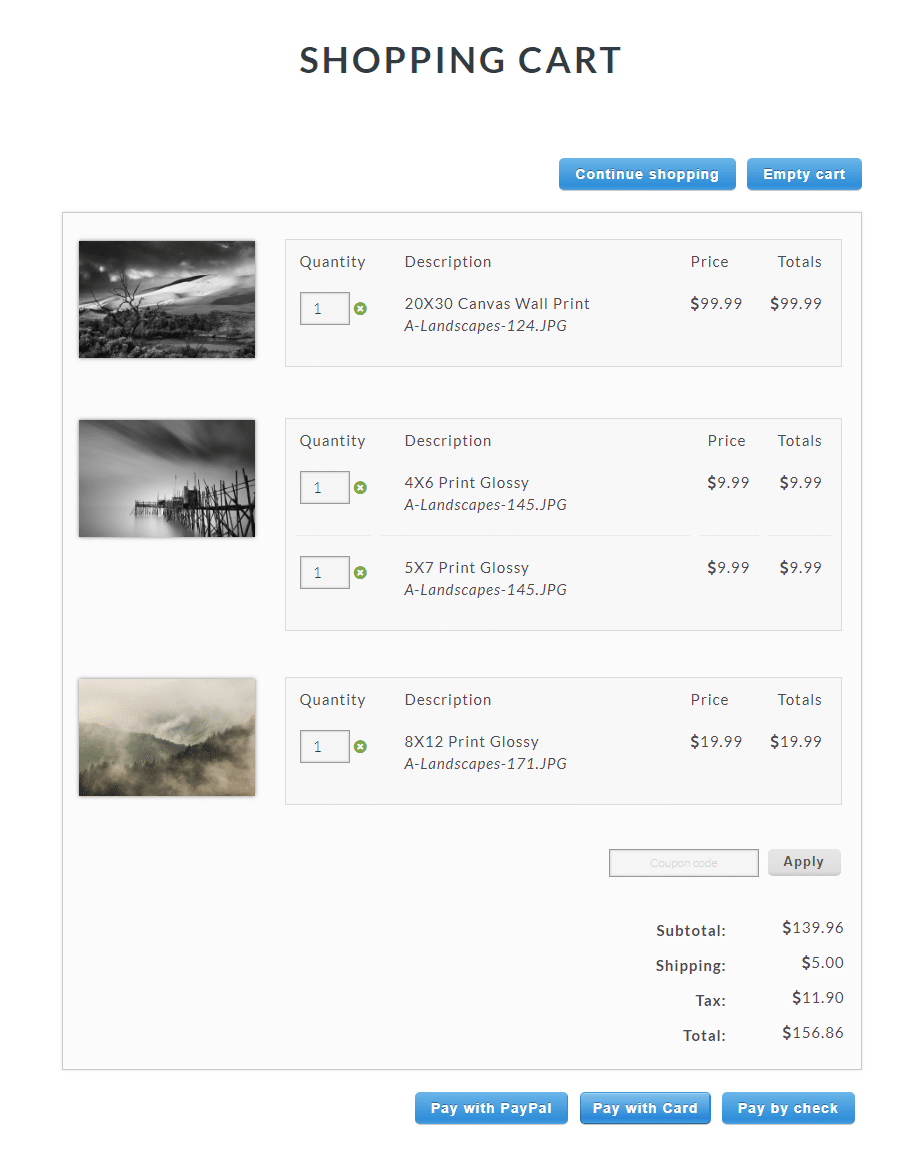
Here visitors can click the 'continue shopping' to go back to the last image in the Pro Lightbox they were viewing, Empty Cart, checkout with PayPal or checkout with a credit card (Stripe).
OTHER HELPFUL ECOMMERCE DOCUMENTATION:
- Ecommerce Settings
- How to Create A Pricelist
