We’ve recently added Braintree as a new gateway option to NextGEN Pro. This article will show you how to set up Braintree as your payment gateway. If you have not already done so, create a new Braintree Sandbox account on braintreepayments.com — please note that the Braintree Sandbox account is not linked to your production account in any way.
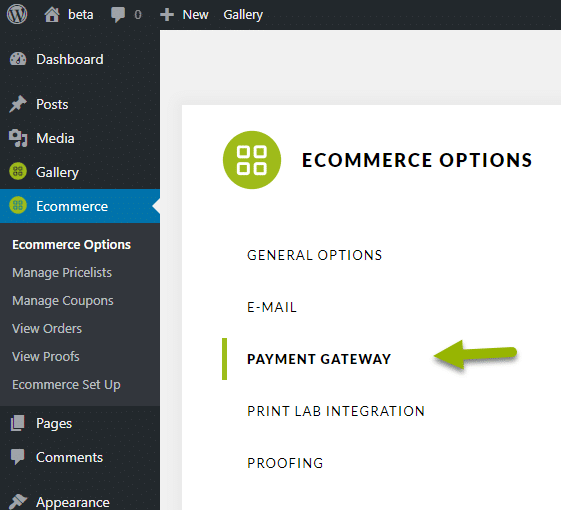
You can locate your Braintree settings under Ecommerce > Ecommerce Options > Payment Gateway

If you want to use Braintree, you should click “Yes” in the option “Enable Braintree”. There are six different settings:
- Use Sandbox: Whether to use a Braintree Sandbox account or not.
- Merchant ID: An identifier to Braintree linked to your account.
- Public key: A public cryptographic key used to securely identify your site with Braintree’s servers.
- Private key: A secret cryptographic key used to securely identify your site with Braintree’s servers.
- Enable PayPal payments: By default only card payments are processed. This option requires additional configuration be done in your Braintree account’s Processing Options.
- Send browser data to Braintree: This option is required to enable Braintree’s premium fraud detection features.
To access (or create) the above settings, begin by logging in to your Braintree account.
- From the Home page, click the gear icon in the top right corner, then click “API”
- On this page you can find your “Merchant ID” setting.
- Click “Generate New API Key” to generate a new key for NextGEN Pro to use on your website.
- The public key will be automatically displayed.
- Click the “View” link in the “Private Key” column to obtain the private key.
Once these settings are entered into NextGEN’s Ecommerce > Ecommerce Options > Payment Gateway page, you may begin testing placing orders through Braintree.
To move a Braintree account into production use, please consult their documentation on how to “Go Live.”
