NextGEN Gallery provides you with the option to automatically resize your images at upload or after you upload your images. You may want all of your images resized or only a few within a gallery.
OPTION ONE – AUTOMATICALLY RESIZE
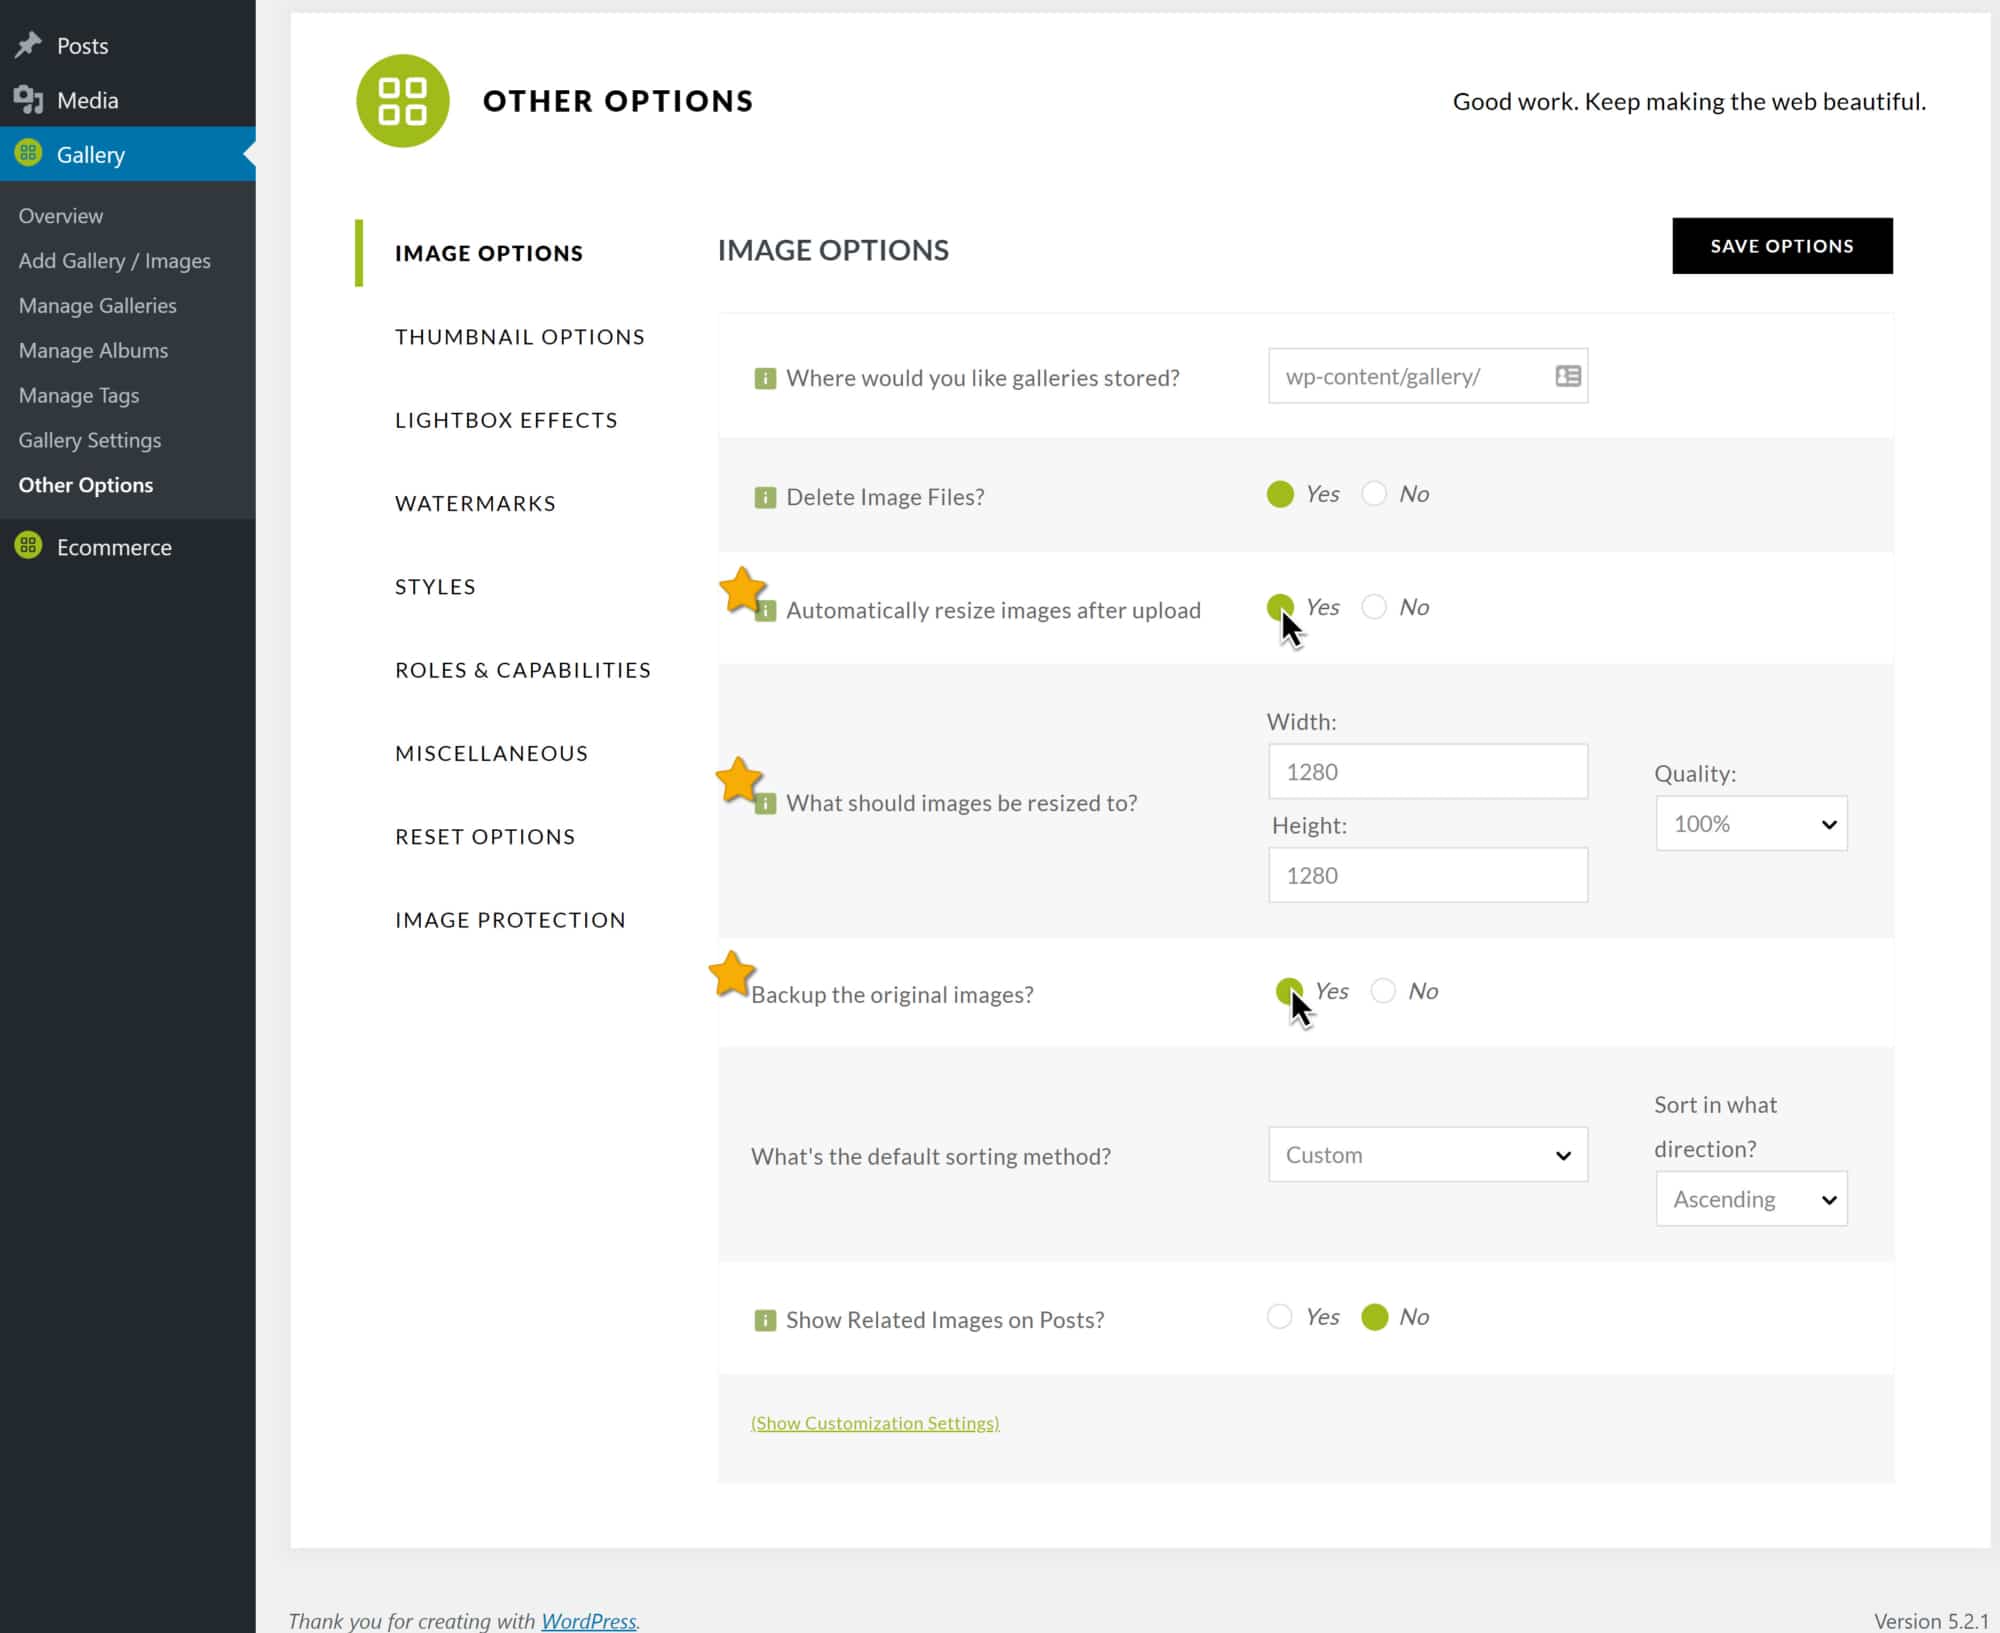
To set the max width and height, go to Gallery > Other Options > Image Options, here you may set the max width and height after setting ‘Automatically resize images after upload’ to Yes, and set other options like ‘Backup original images’. If you need to restore an image (i.e. after watermarking, and resize and reset the watermark again), you will need to have had the backup images setting turned on before you uploaded your images. Keep in mind that after you activate this setting to automatically resize images, all images you upload after applying this setting will be resized automatically. Previous images you had uploaded will not be resized.
OPTION TWO – MANUALLY RESIZE AFTER UPLOAD
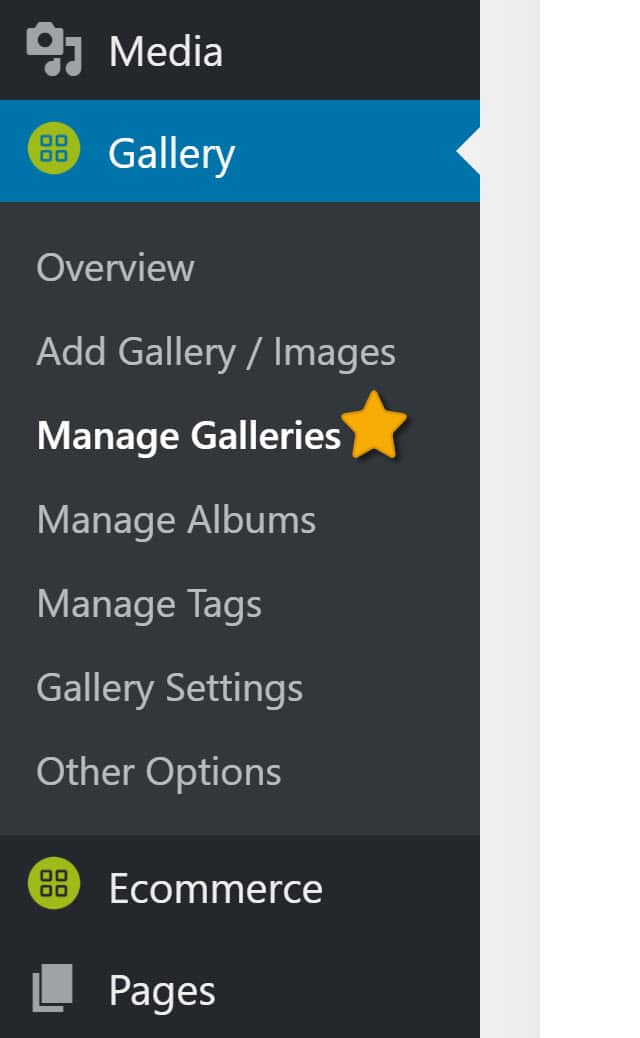
1) After uploading your gallery, go to Gallery >> Manage Gallery > and select the gallery you wish to edit the images.
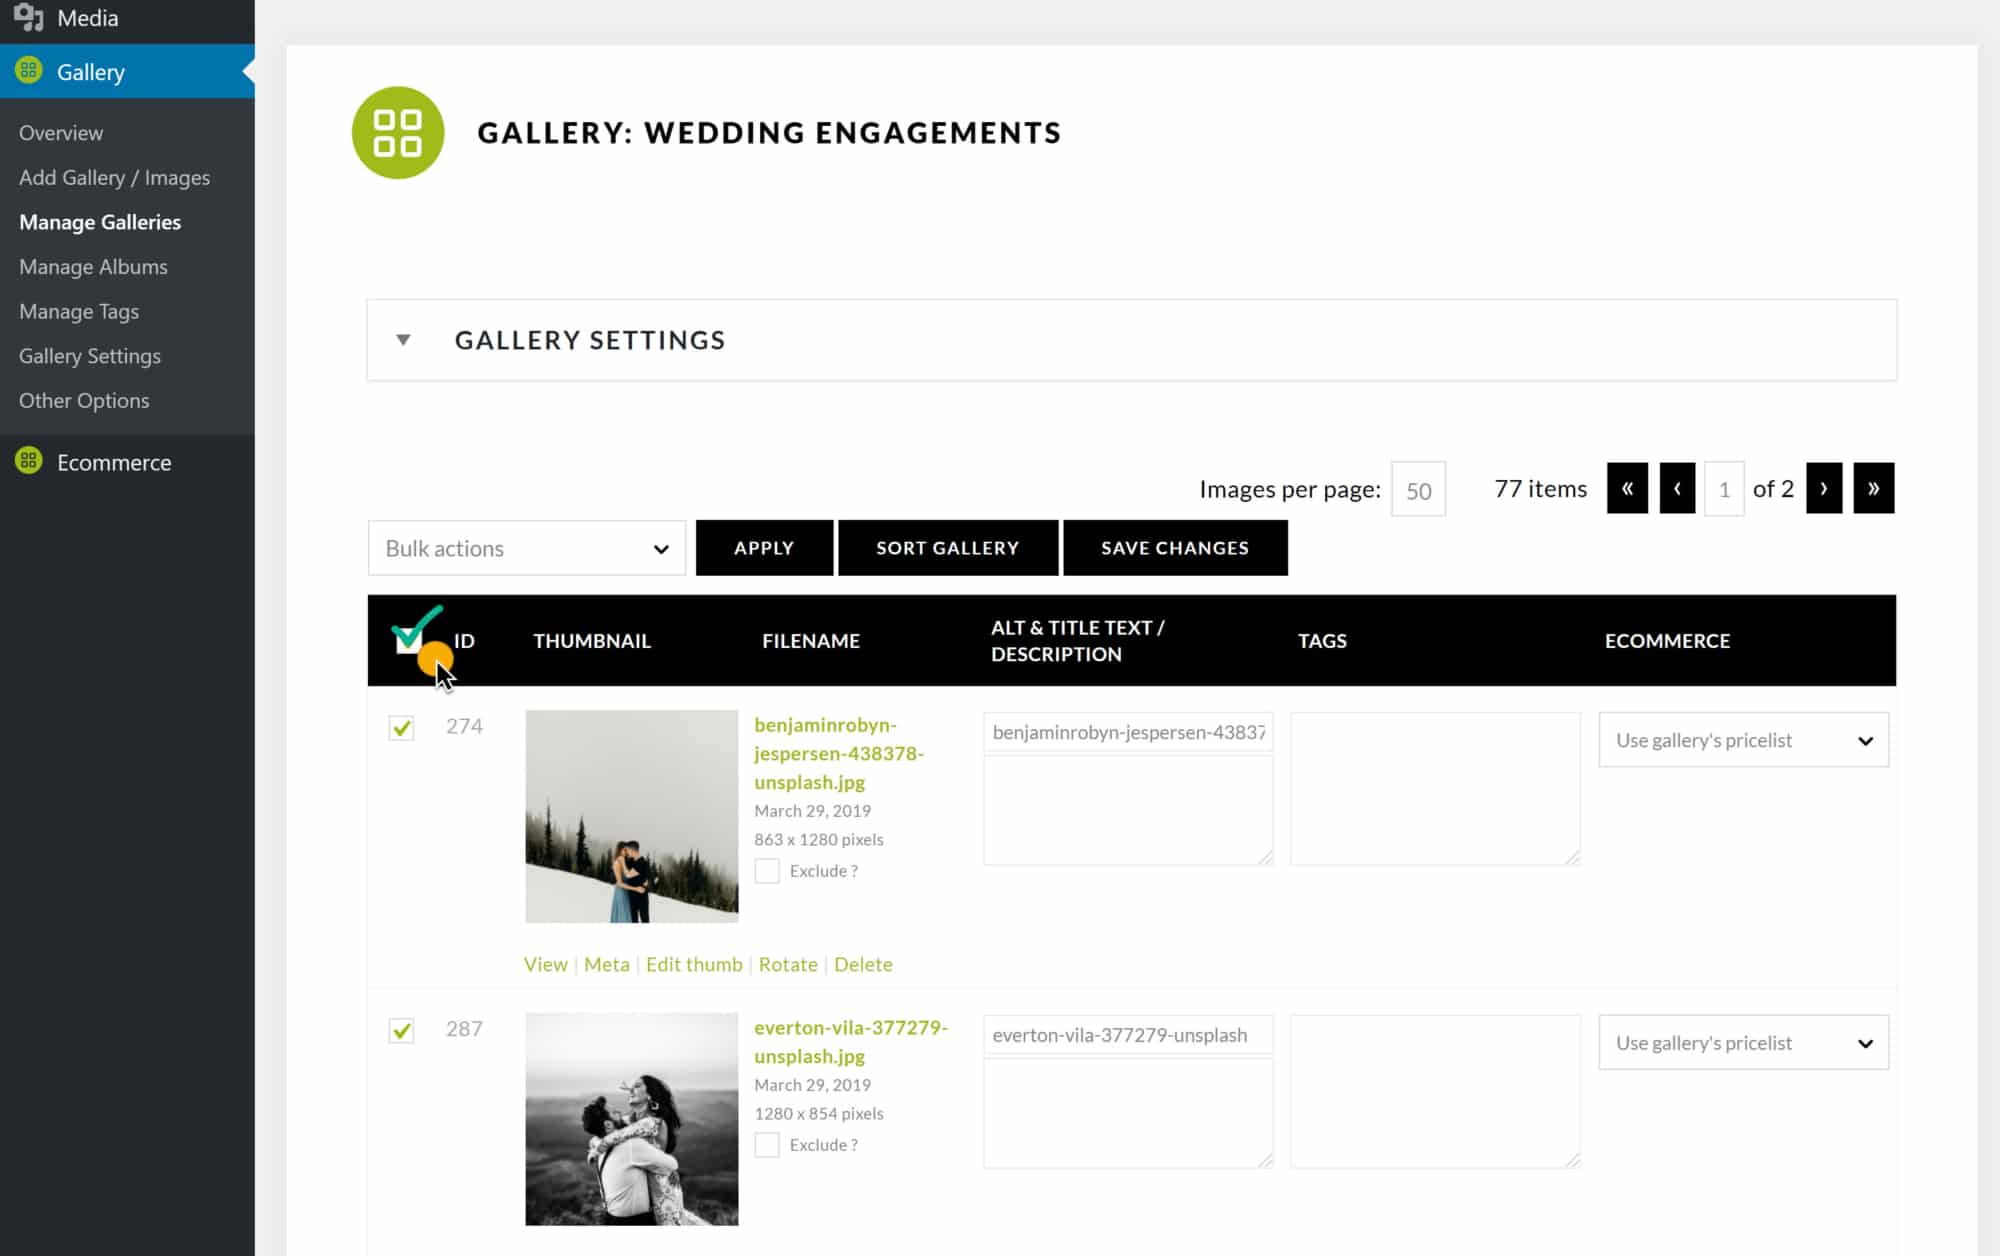
2) Select the ‘all’ selection box here, or you may choose to select and modify a single image at a time, in which case you would select the box next to the single image you wish to edit:
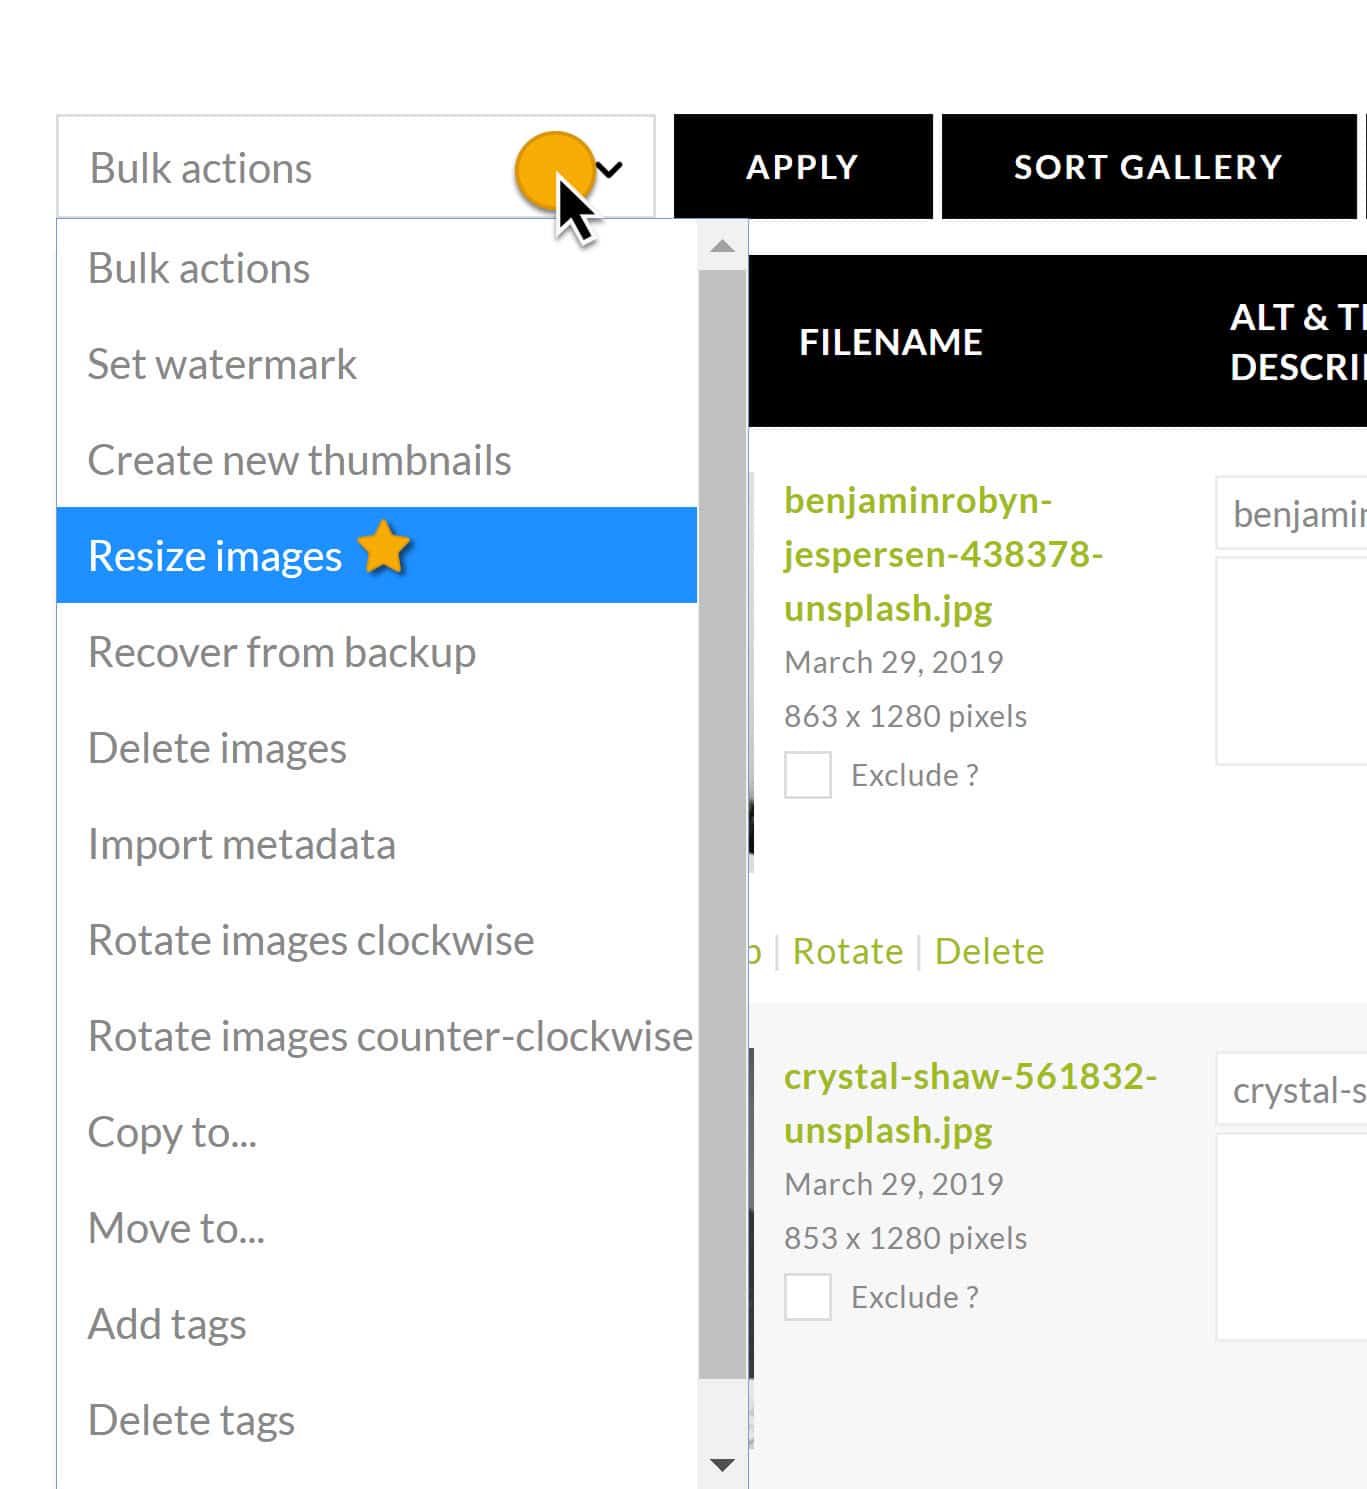
3) Select in ‘Bulk actions’ dropdown, the option to ‘Resize images’ and then click the ‘Apply’ button.
4) A pop up window will appear where you can set the width and height of the image. NextGEN Gallery will keep aspect ratio intact. Once you are done, click ‘OK’ and NextGEN Gallery will make the changes.
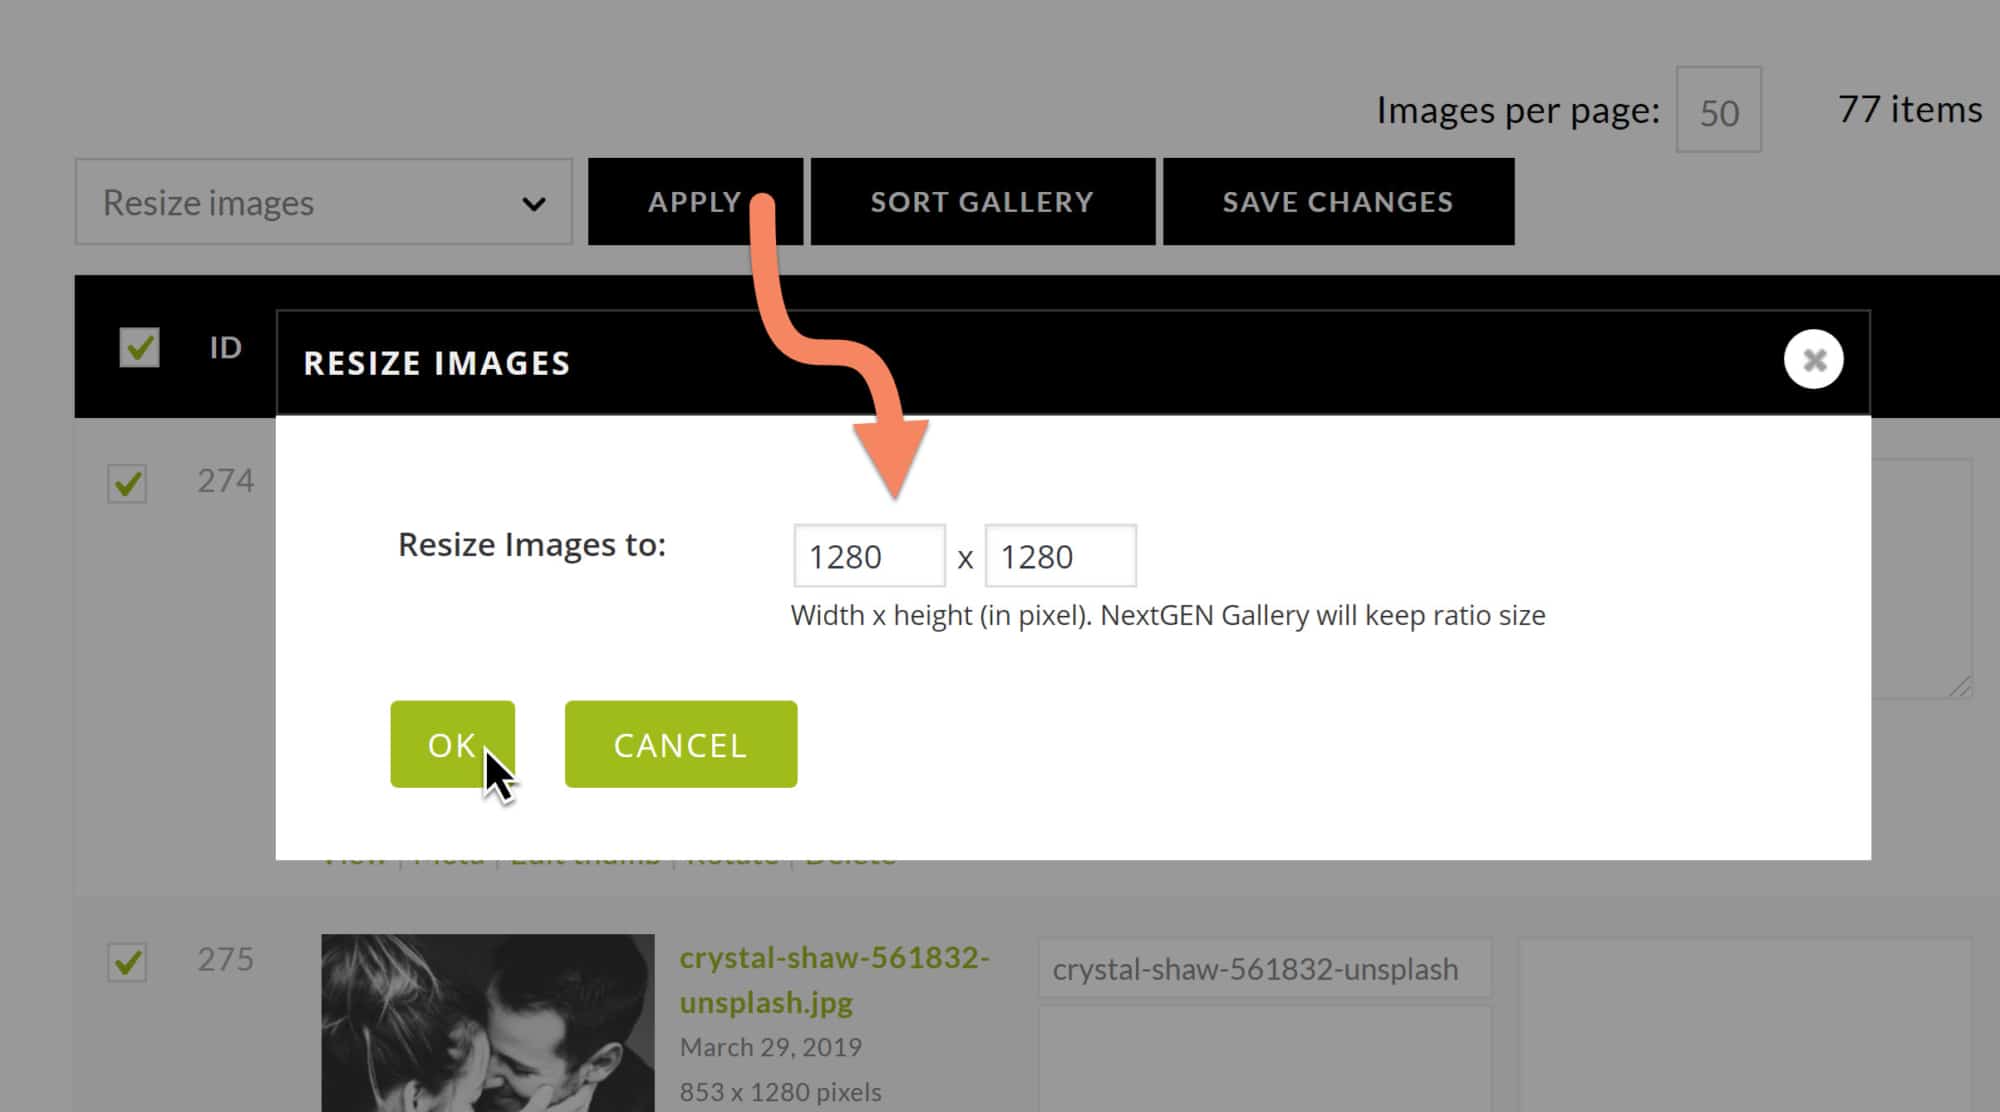
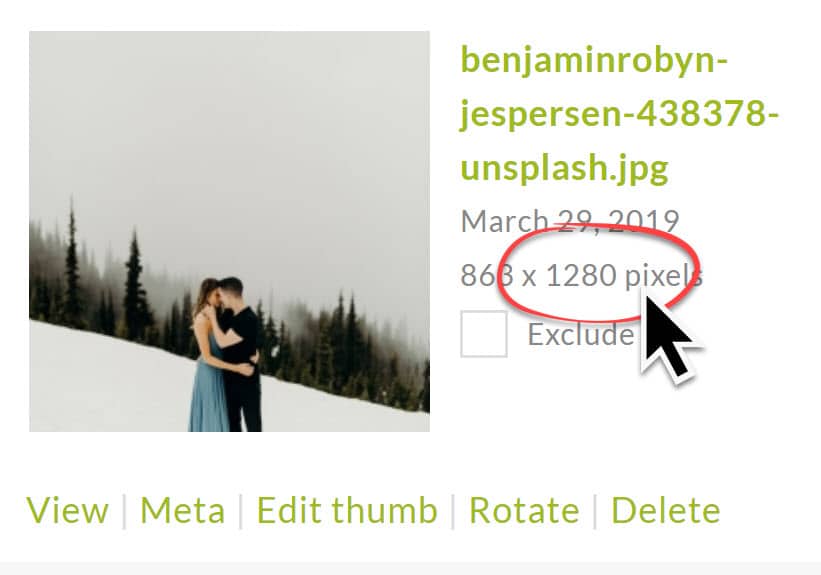
5) Once the process is complete, you should see the updated image size under the image information as shown in this screenshot:
6) Save changes and you’re done!
