Before moving forward, it’s necessary to know what a Widget in WordPress means!
Basically, a Widget is a small block that adds specific features/content to the site, like a Search bar, Text box, Image, etc. All widgets have their own features and functionality. For example, a search bar is used to search content on the site, whereas an image is used to add images.
These widgets are now added to various site areas according to the site’s requirements. In this guideline will discuss the steps to add widgets to the Sidebar and Footer area.
Adding Widgets to Sidebar/Footer
Widgets can be added to the Sidebar and Footer area differently. You can choose from the Dashboard or add them through the theme customizer area. It solely depends on you which to choose from.
WordPress widgets now work differently as Block Widgets than Classic Widgets. Block widgets provide more flexibility and design options than the old drag-and-drop interface with Classic widgets.
Add Widgets from the Dashboard
To add the widgets from the Dashboard, follow the steps below
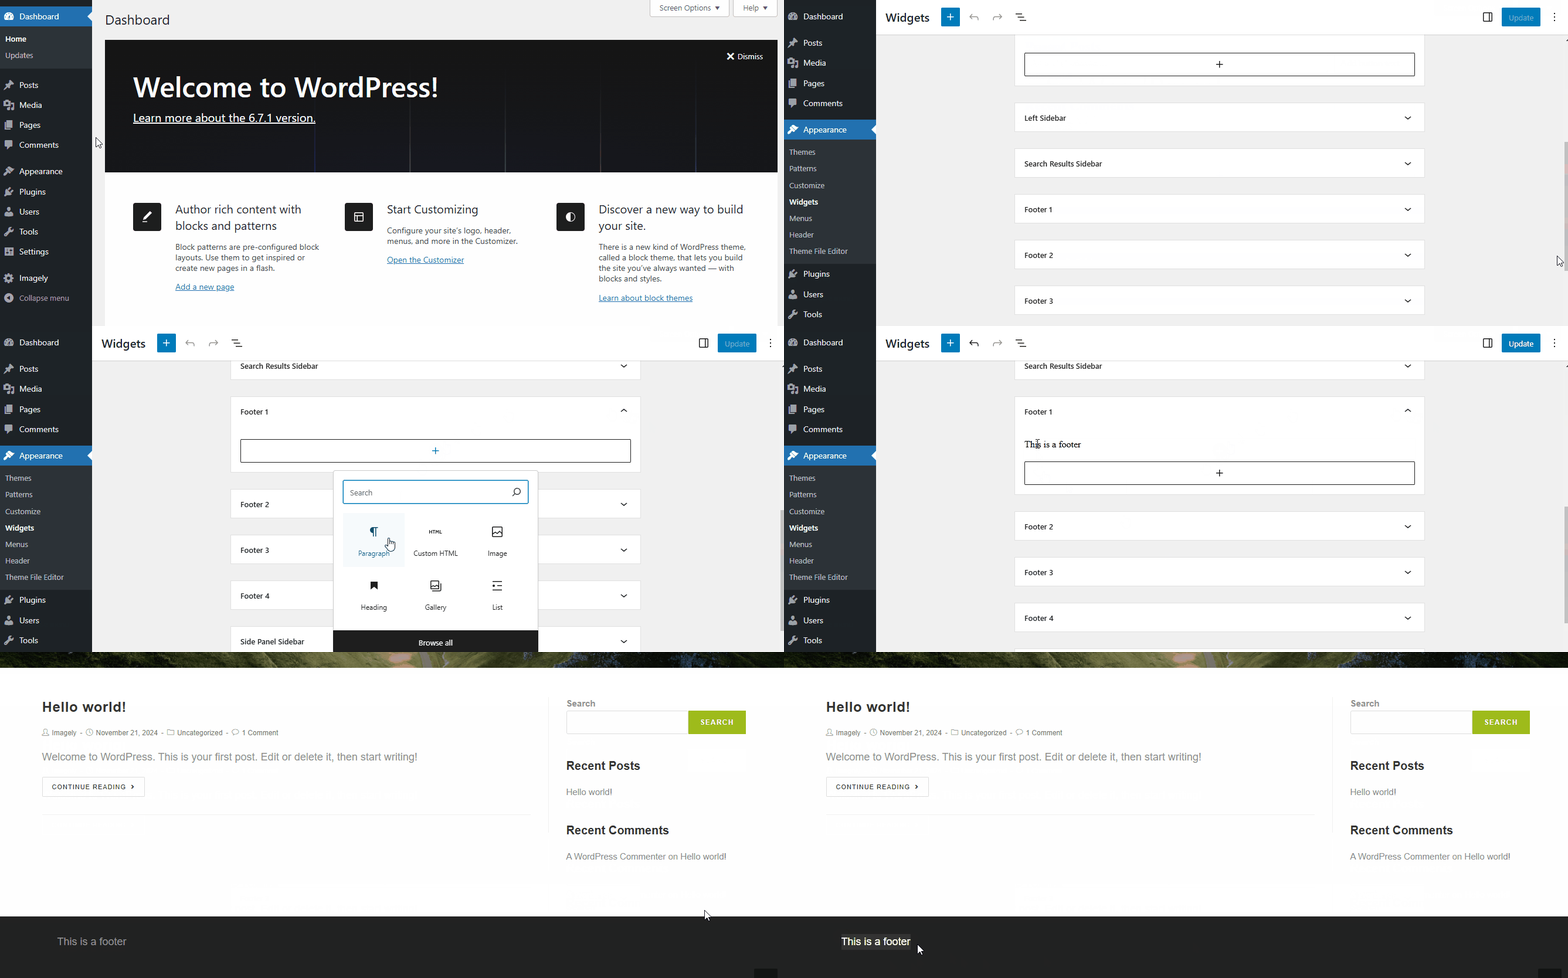
- Navigate to WordPress Dashboard > Appearance > Widgets.
- Choose the desired widget location (footer/sidebar) where you want to place your widgets.
- Click on the plus (+) to browse and select the widgets you wish to add.
- Edit the widgets by adding text or making any other necessary modifications.

Add Widgets from the Customizer
To add the widgets from the Customizer, follow the steps below
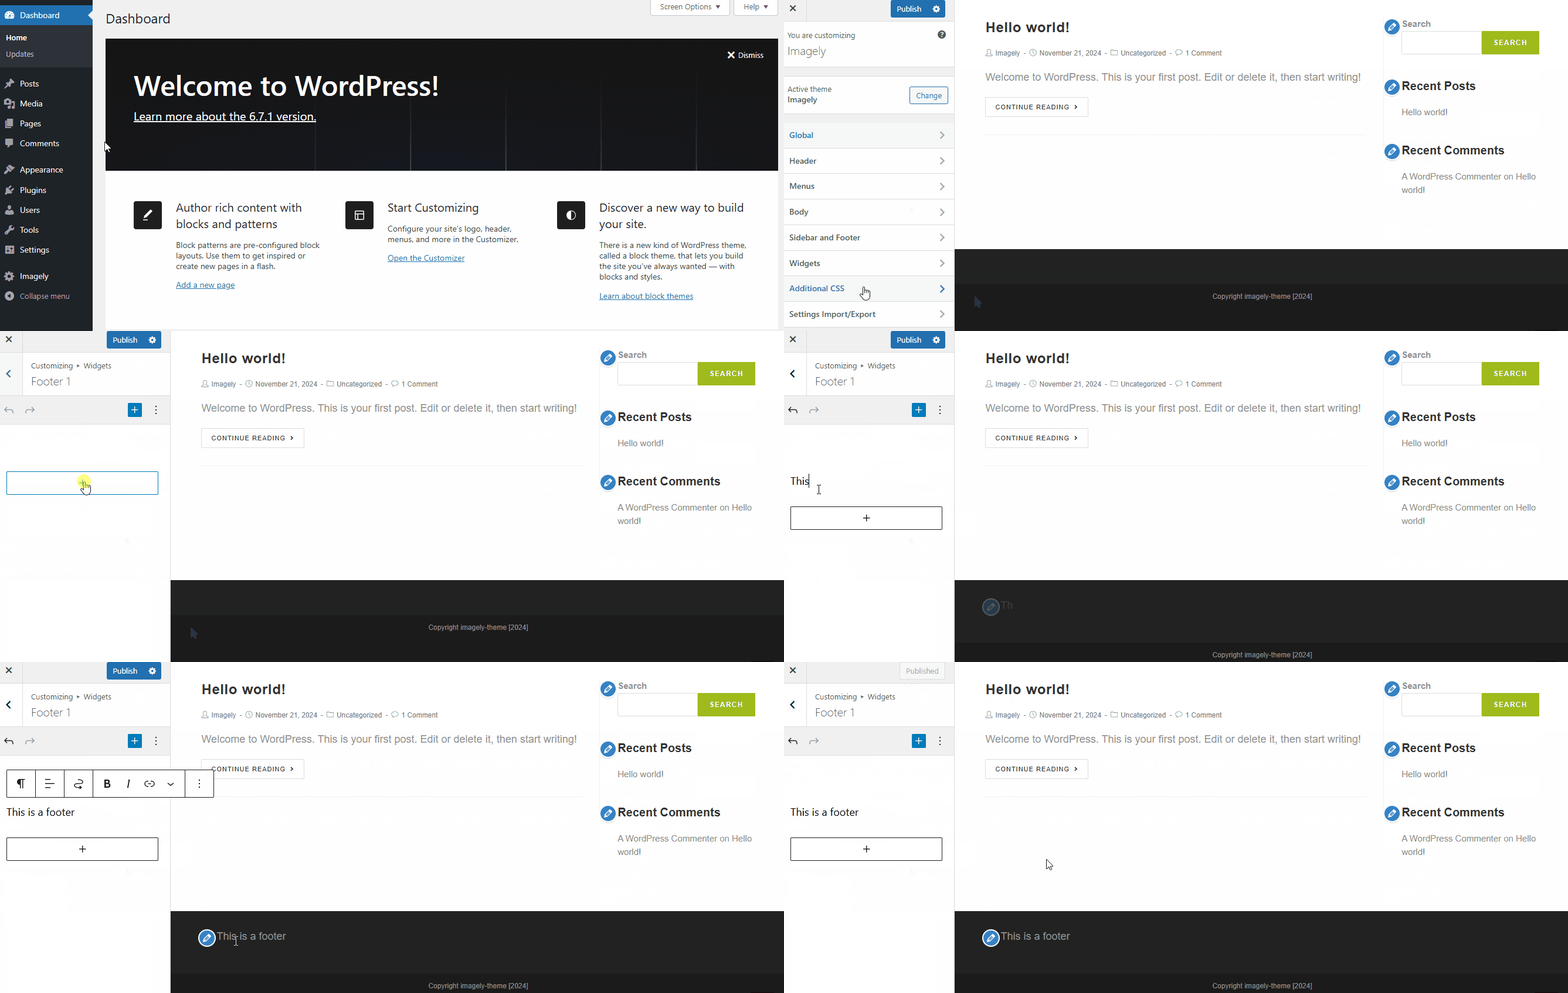
- Navigate to WordPress Dashboard > Appearance > Customize > Widgets.
- Choose the desired widget location (footer/sidebar) where you want to place your widgets.
- Click on the plus (+) to browse and select the widgets you wish to add.
- Edit the widgets by adding text or making any other necessary modifications.

If you want to learn more about Widgets, then check out the official WordPress guide here 🙂.
