NextGEN Pro Ecommerce makes it quick and easy to get your images or products up for sale through any of our gallery displays in just a few short steps.
1) Configure your ecommerce settings under Ecommerce > Ecommerce Options.
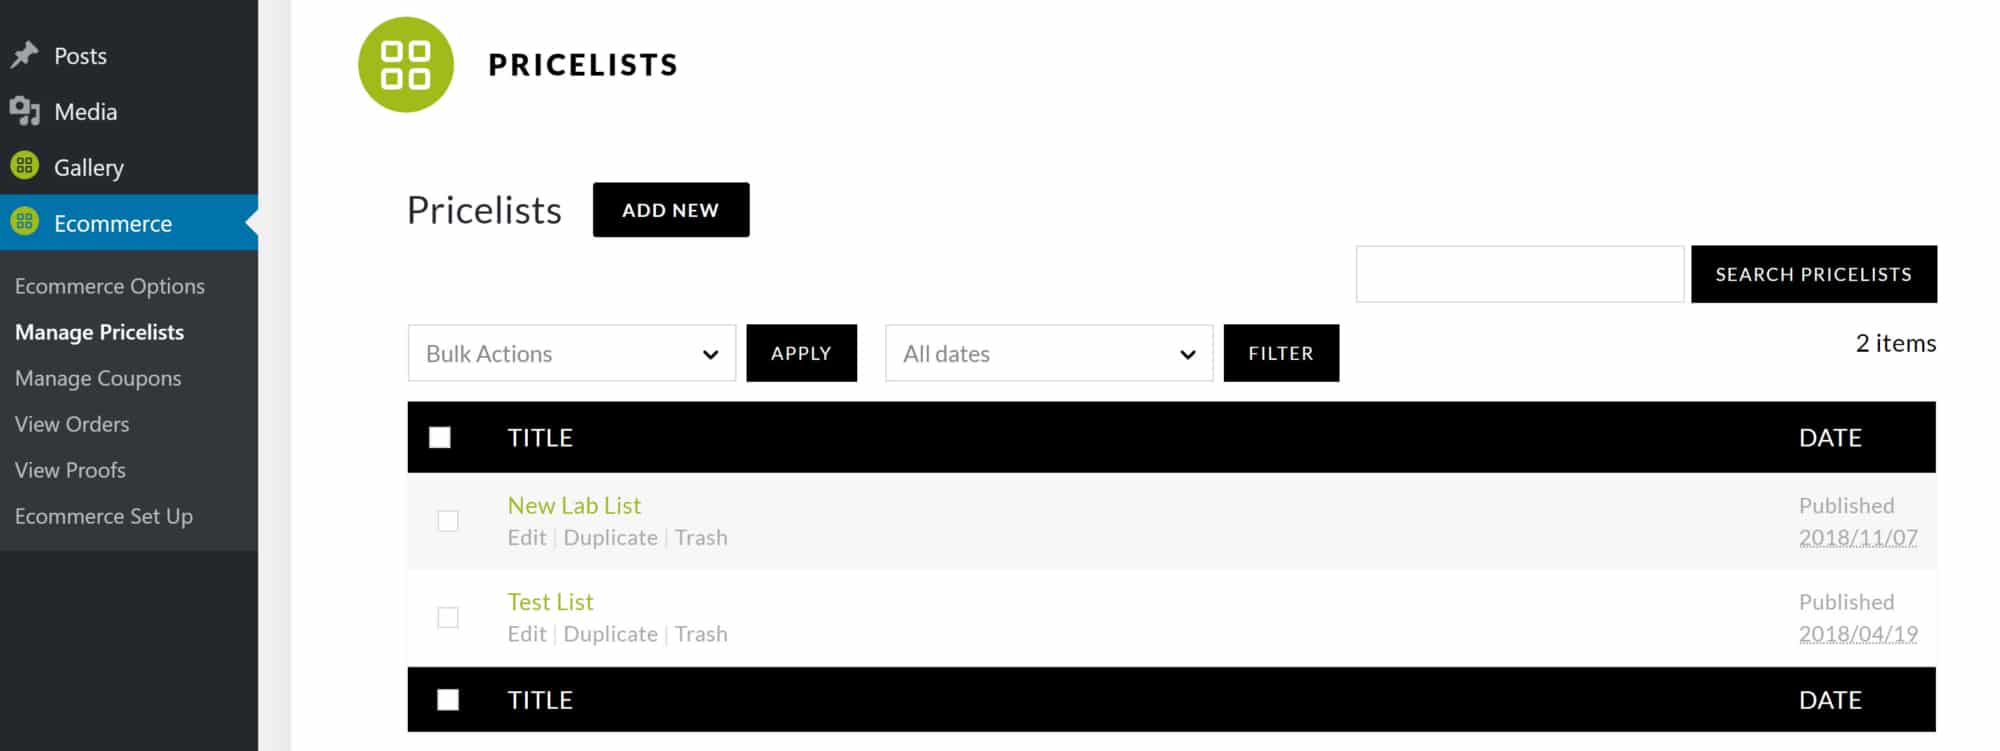
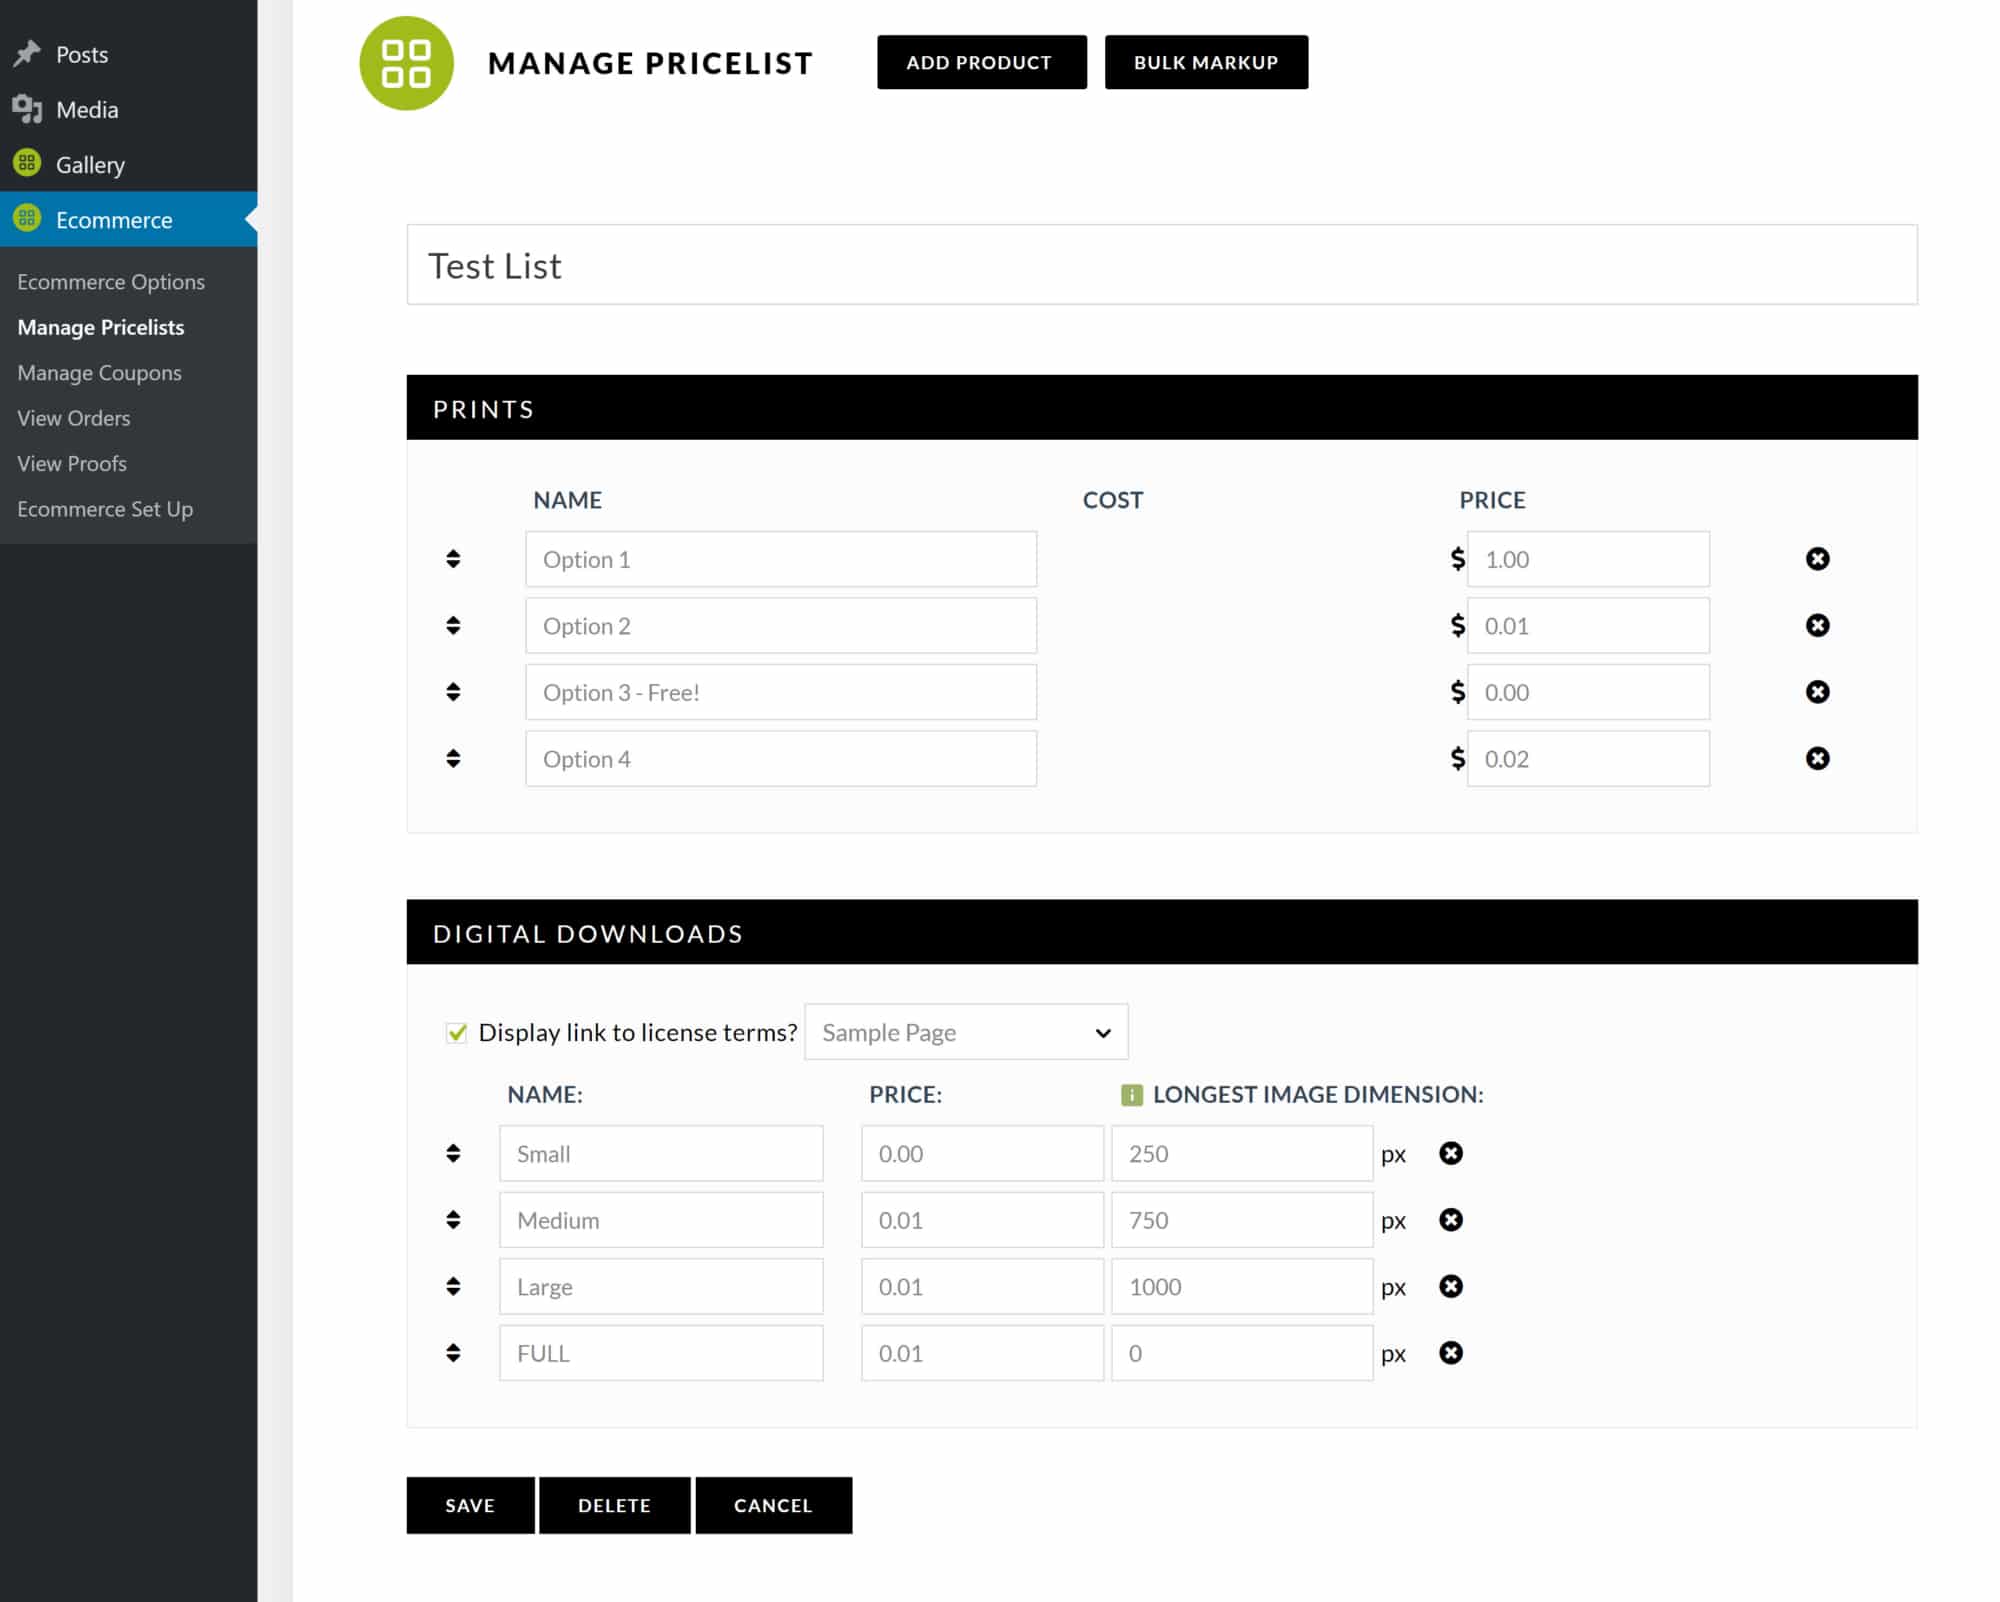
2) Create one or more pricelists under Ecommerce > Manage Pricelists.
3) To assign your pricelist to a gallery navigate to Gallery > Manage Galleries > Select your gallery, select the ‘Gallery Settings’ tab at the top of the list of images and select your pricelist and save changes. You can modify what images are for sale, what images should be assigned to a different pricelist, or leave the assigned pricelist as the default listed under ‘Gallery Settings’.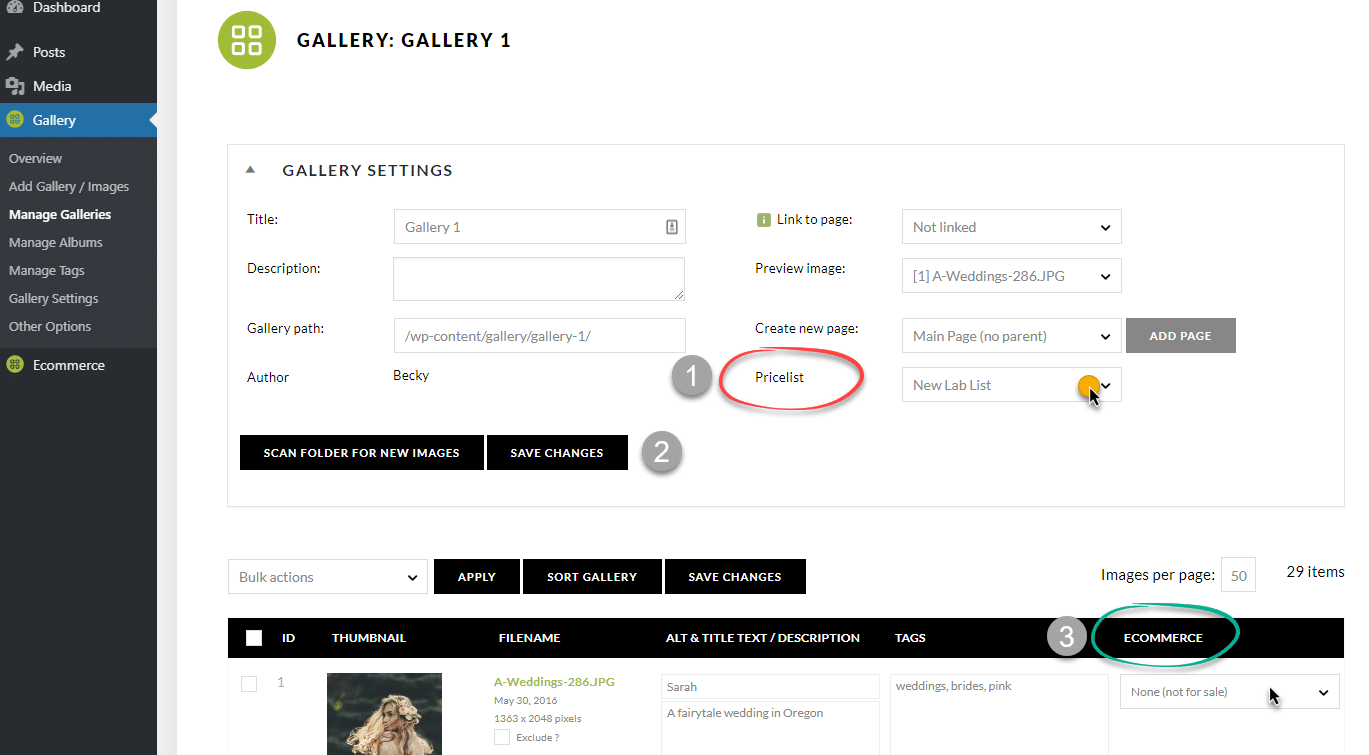
4) After selecting your gallery display through the Add Gallery Window in your post/page edit, select the tab at the top of the Add Gallery Window ‘Customize Display Settings‘…
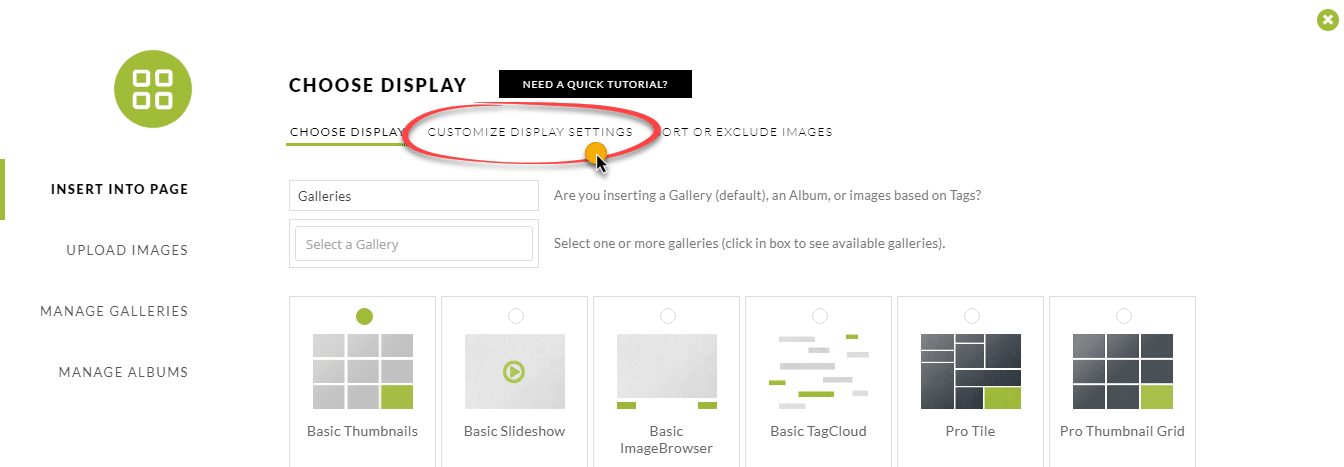
Under ‘Customize display settings’ be sure to select ‘Enable ecommerce’ before inserting the gallery to the page. 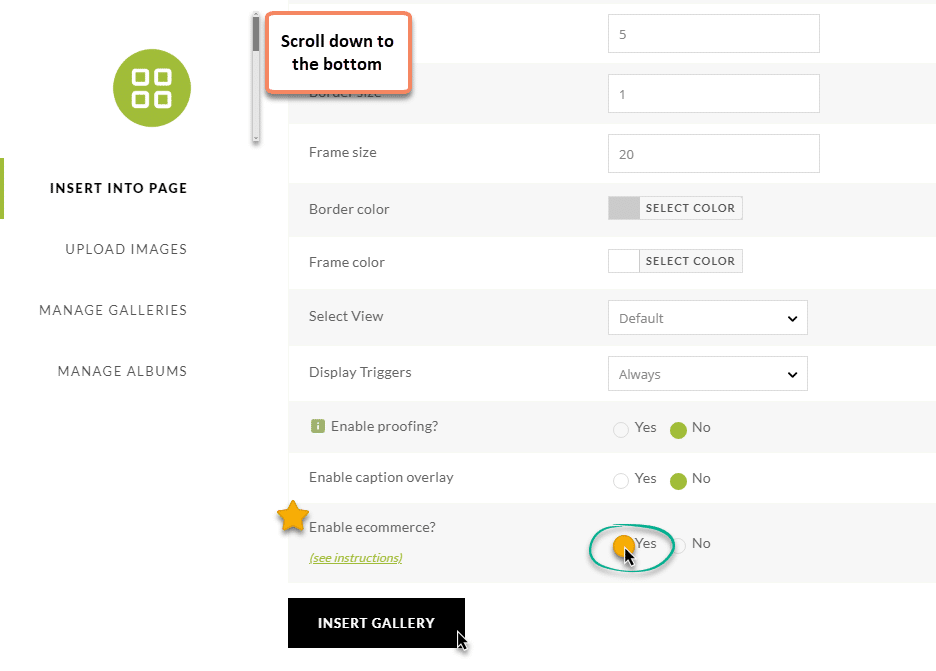
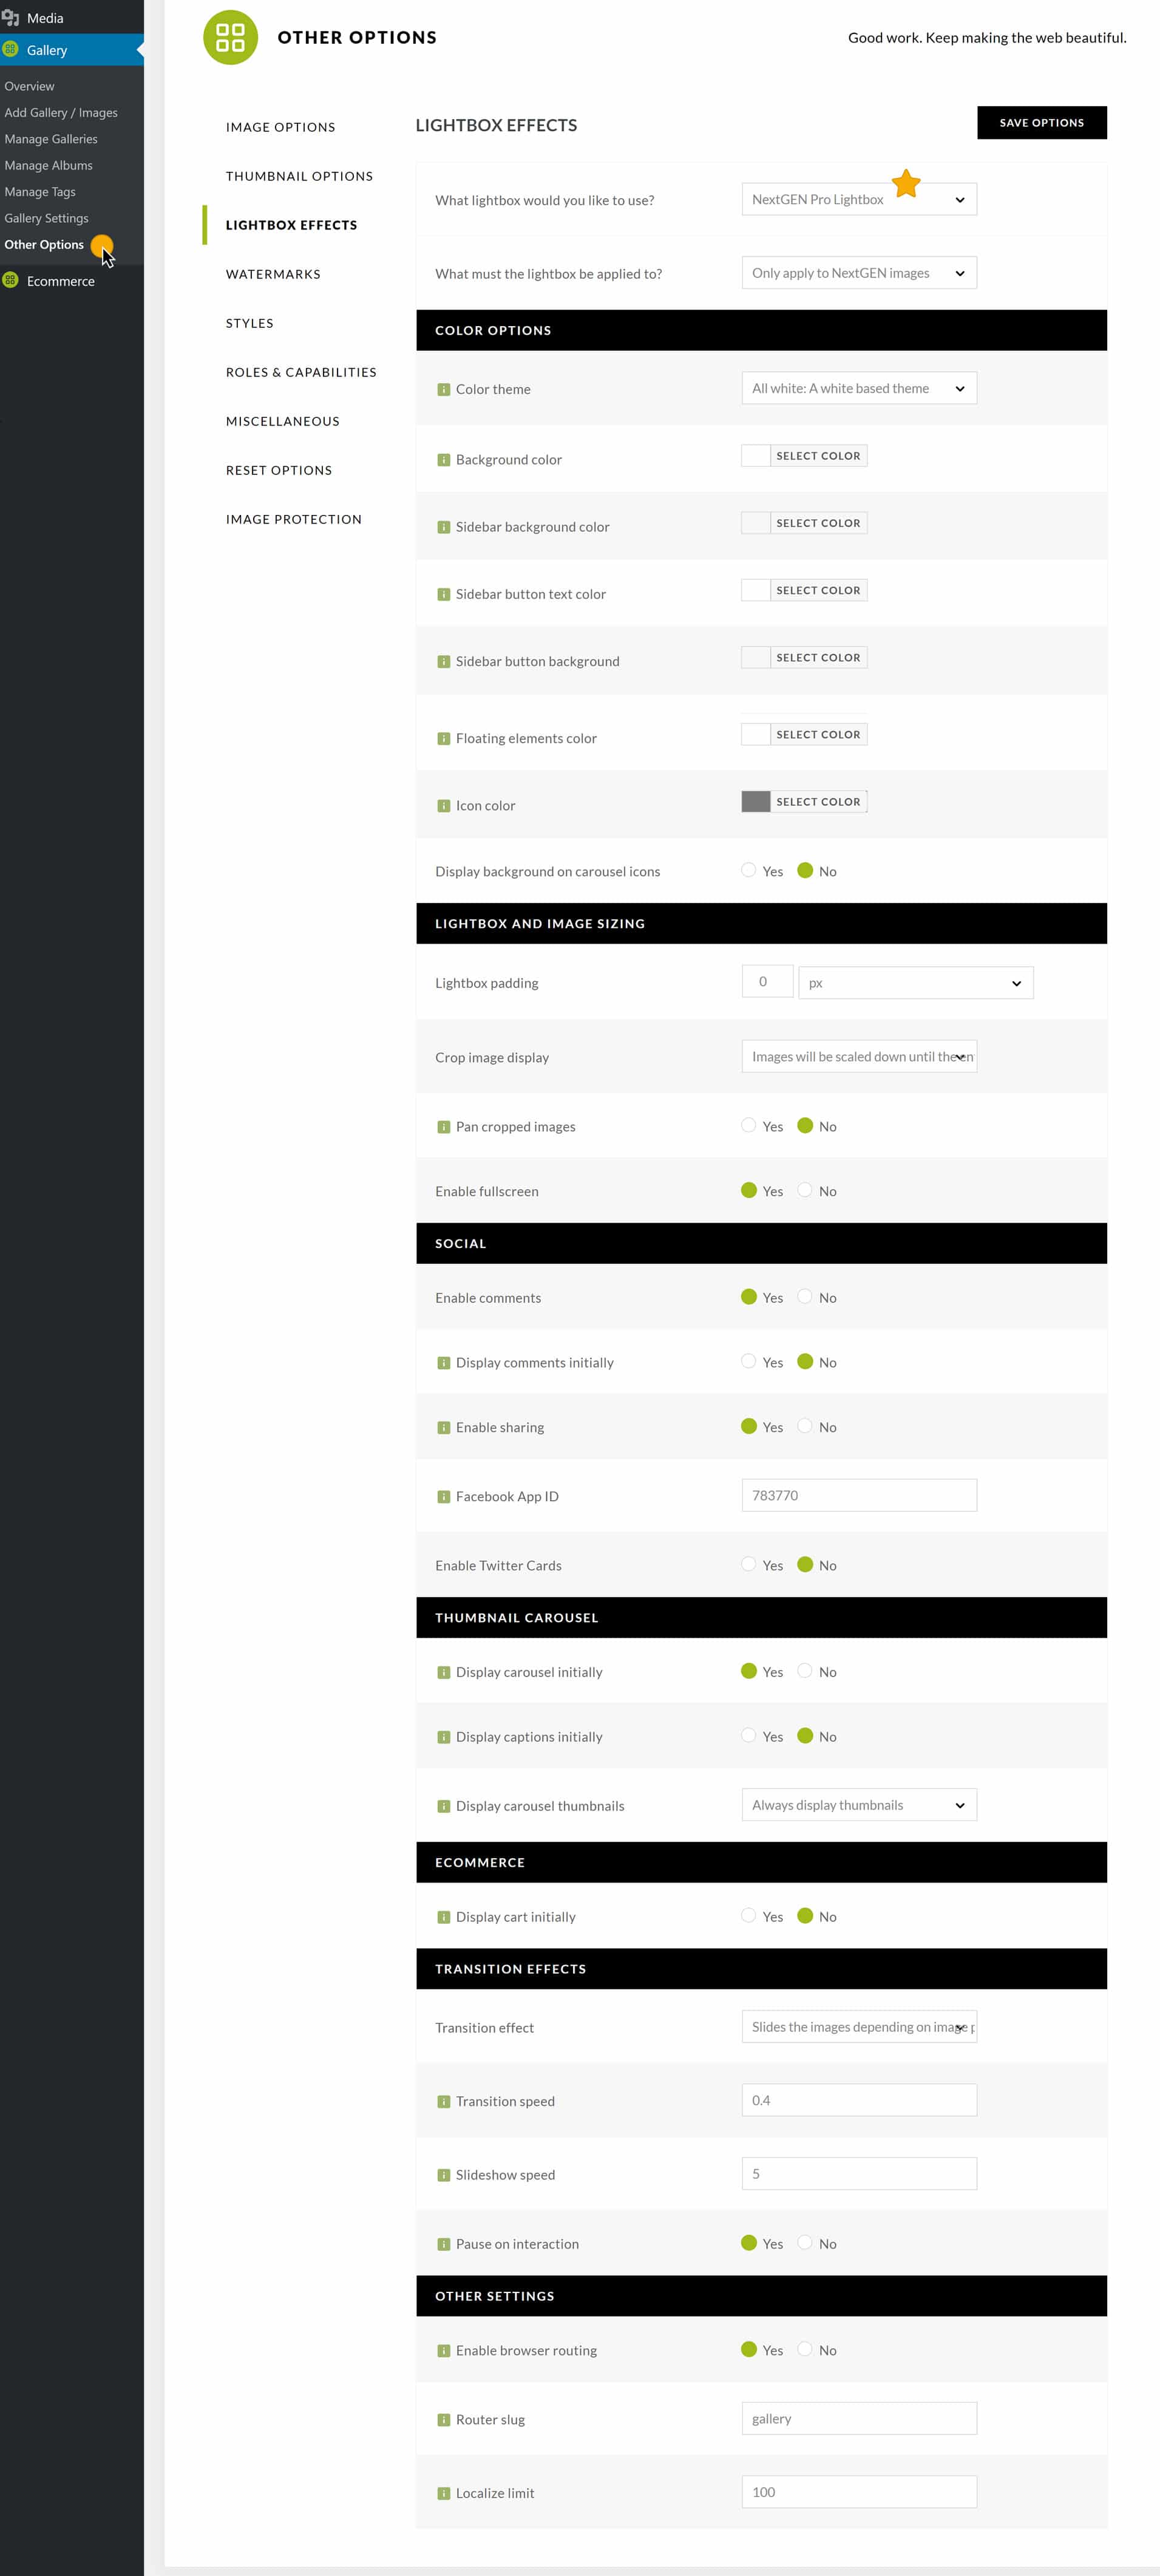
5) It is important to note that Ecommerce is active in the NextGEN Pro Lightbox display, so you’ll need to make sure that is set as your active Lightbox Effect under Gallery > Other Options > Lightbox Effects.
OTHER HELPFUL ECOMMERCE DOCUMENTATION
– Ecommerce Settings
– How to Create A Pricelist
– How to Add Ecommerce
