We’ve recently added PayPal Checkout as a new gateway option to Imagely Pro. This article will show you how to set up PayPal Checkout as your payment gateway.
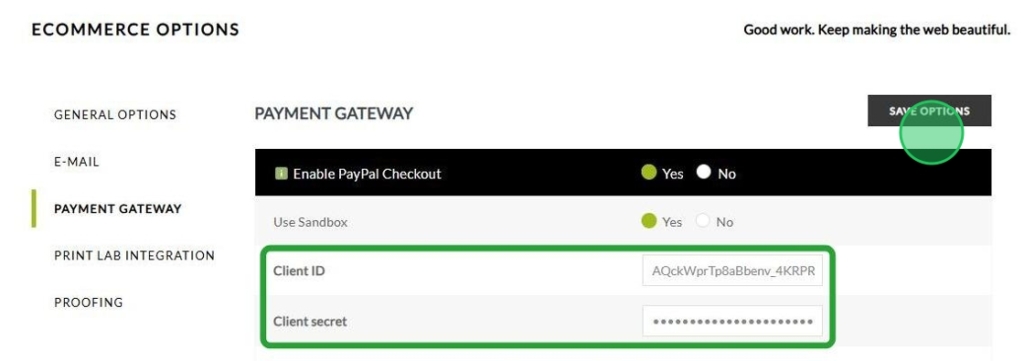
You can locate your PayPal Checkout setting under Ecommerce > Ecommerce Options > Payment Gateway.
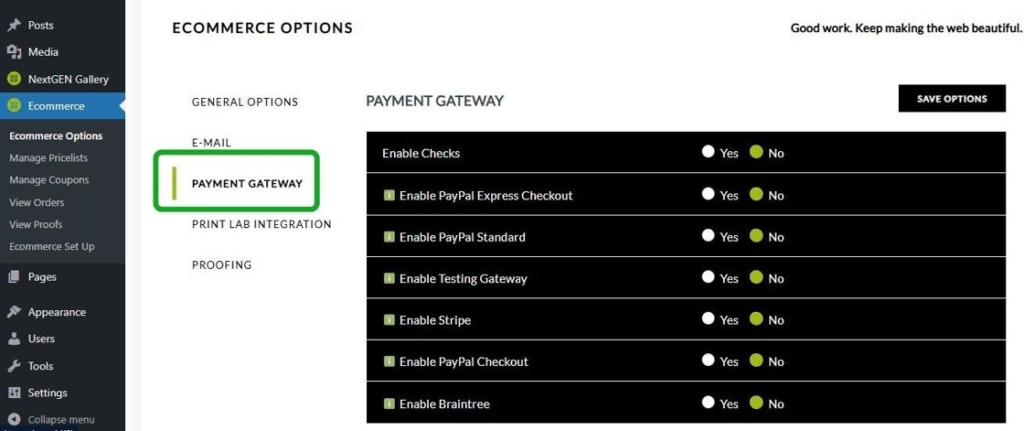
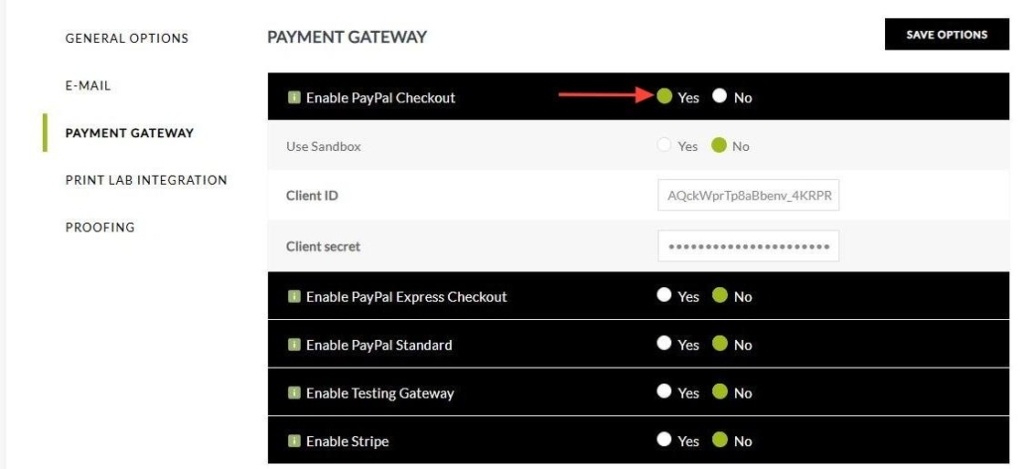
If you want to use PayPal Checkout, you should click “Yes” in the option “Enable PayPal Checkout.” There are three different settings:
- Use Sandbox: Whether you like to use a PayPal Checkout Sandbox account or not.
- Client ID: A long string used to validate your PayPal Client ID.
- Client Secret: A long string used to validate your PayPal Client Secret Key.
Creating your REST API key
Create or Upgrade to PayPal Business account
You’ll need a PayPal business account to use PayPal Checkout.
- Create:Sign up for a PayPal Business Account.
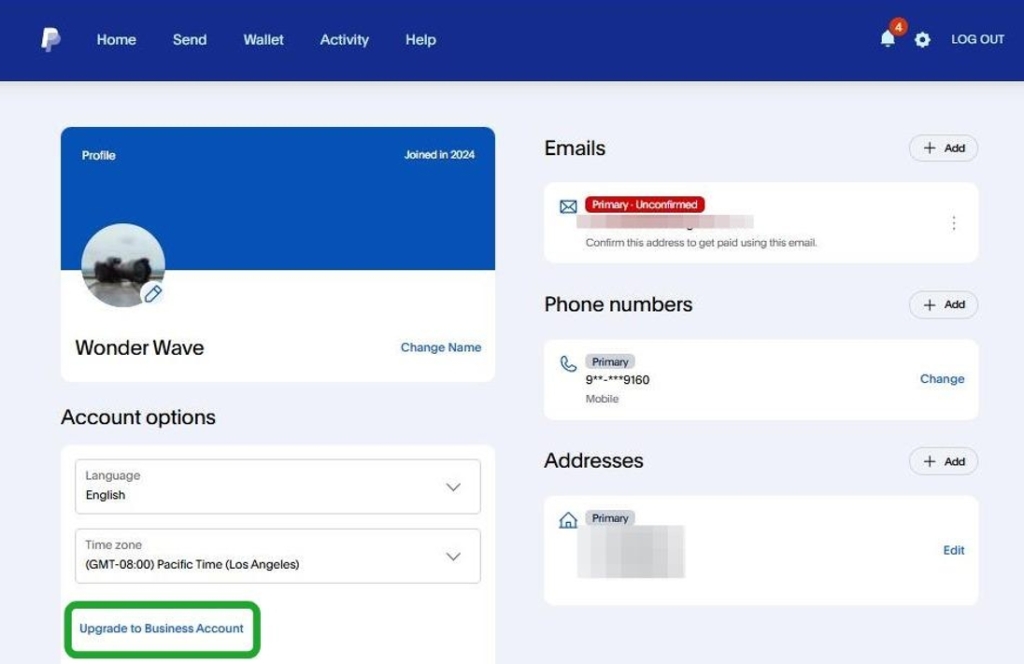
- Upgrade: Login into your account, navigate to your Profile, and select the option “Upgrade to a Business Account”.
Retrieve PayPal API Keys
Once you’ve upgraded to a Business Account, you can retrieve your API keys by logging into the PayPal Developer Dashboard with your PayPal account credentials.
After logged-in, from the top menu click on APIs, select the option “REST APIs“

On Apps & Credentials, click the Live toggle.
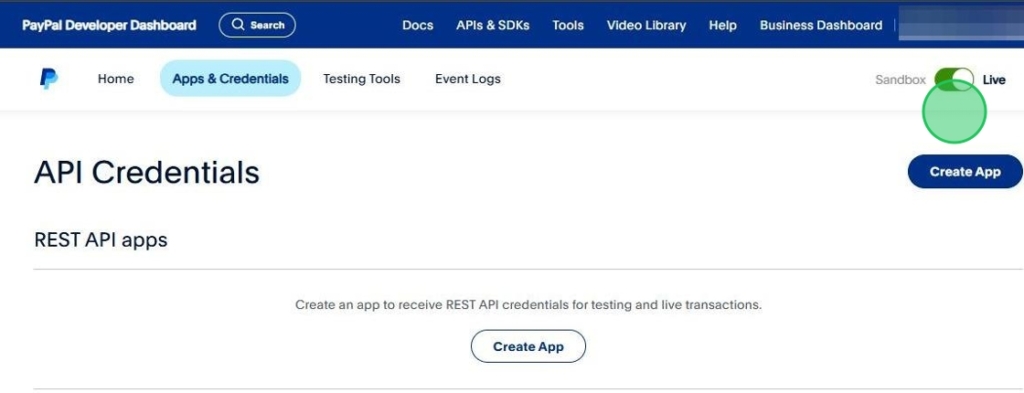
In the REST API apps section, click Create App.
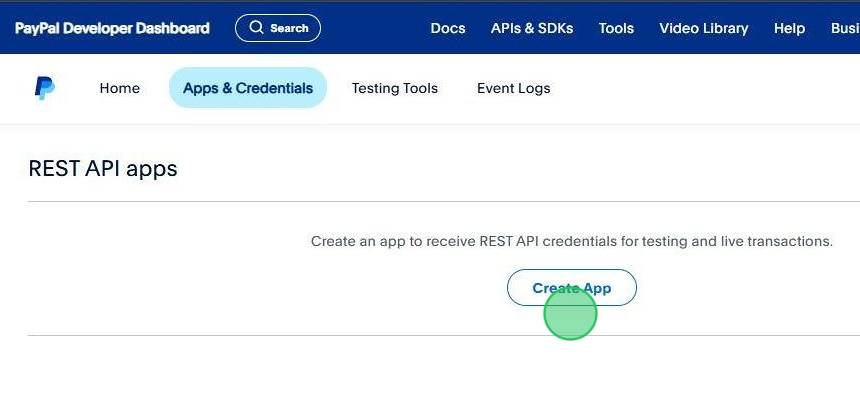
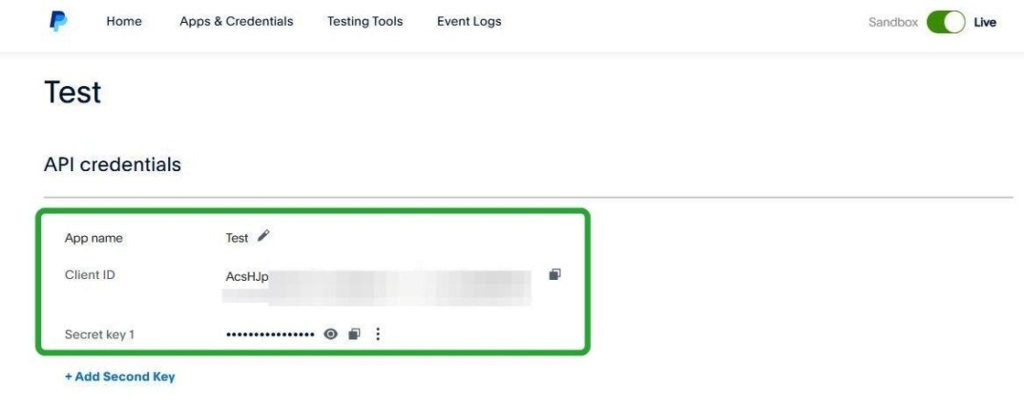
Give your app a name you will remember and associate it with your website. Find and copy your live client ID and Client Secret.
- App Name: This is the name of your API, and it is recommended that the name is similar to your website. You can edit the display name by clicking in the pencil.
- Client ID:Your Client ID
- Secret Key: Your Client Secret ID.
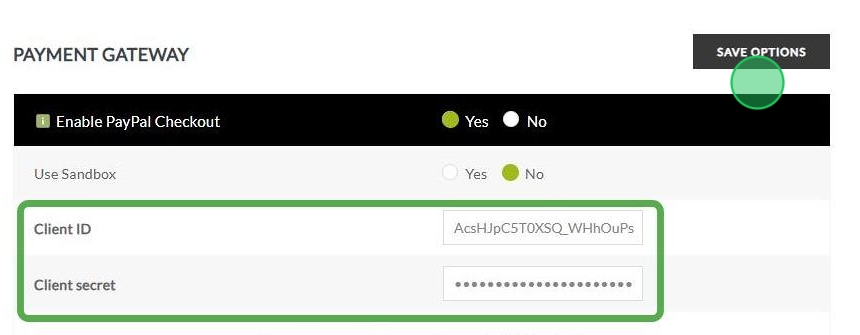
Finally, return to your own website dashboard, and paste your live client ID and Client Secret into the associated PayPal Checkout fields under Ecommerce > Ecommerce Options > Payment Gateway > PayPal Checkout. Be sure to save your settings.
Note: Be sure to have the “Use Sandbox” option set to “No”.
Once you have set up everything, you can go back to your PayPal development account and check if the connection is working. You will see the status “Enabled” next to the Secret.
Use Sandbox
The PayPal Sandbox is a self-contained, virtual testing environment that mimics the live PayPal production environment. It provides a shielded space where you can initiate and watch your application process the requests you make to the PayPal APIs without touching any live PayPal accounts. You will need a separate Business sandbox account if you want to test that mode.
You need, of course, to create a REST API Sandbox account instead.

While creating your new API, consider using the name “Sandbox” to avoid confusion with your live API.
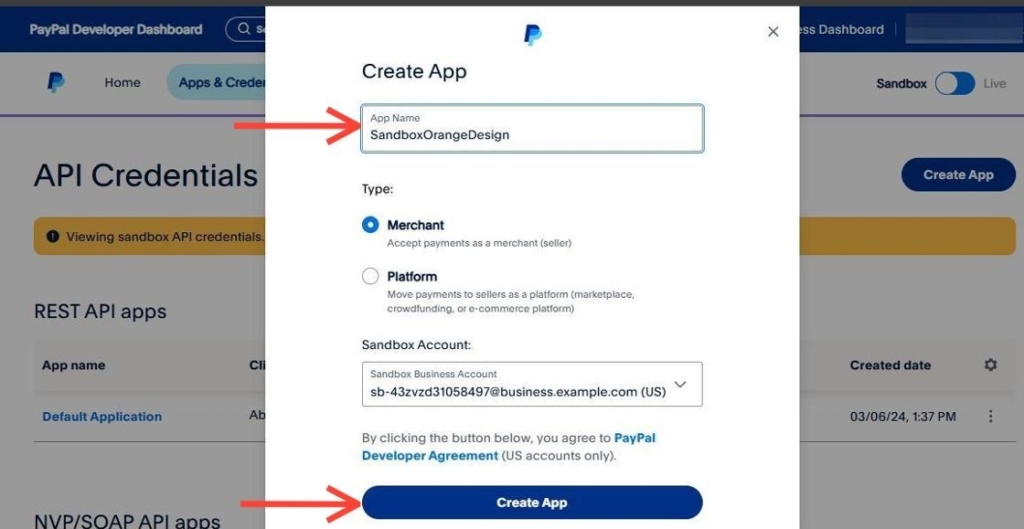
You should enable the option “Use Sandbox” and include the information from your Sandbox account in the “Client ID” and “Client Secret”. Do not forget to click on “Save Options”.
Other Payment Gateways
PayPal offers multiple ways to link to PayPal for checkout. Historically, Imagely Pro has offered PayPal Standard and PayPal Express. While we still offer these, PayPal is slowly phasing them out and replacing them with something called PayPal Checkout. To see all our available payment methods, please visit this link, “Ecommerce Settings“.
