While setting up your NextGEN Gallery Pro plugin you will need to set up some options under Ecommerce > Ecommerce Options. Here are the available options:

- General Options: Currency, Ecommerce default pages, Studio information, shipping, taxes, cookies, and coupon settings.
- E-mail: Setup your orders email, subject and content.
- Payment Gateway: Choose between the available payment gateways (PayPal, Stripe, Checks, test).
- PrintLab Integration: Required if you are going to use our automated print fulfillment service.
- Proofing: Includes a setting by default, allows you to set up the email format if you enable proofing in your galleries.
GENERAL OPTIONS

- Currency: Set your currency.
- Default Ecommerce pages: Can be set by an existing page you have created and published (an associated short-code will need to be added to those pages), or if you leave the drop-down selection at ‘Create new’ when you save the Ecommerce settings it will create those pages automatically for you (and automatically add the shortcode to those pages).
- Checkout Page: Requires the shortcode [ ngg_pro_checkout ]
- Thank-you page: Requires the shortcode [ ngg_pro_order_details ]
- Cancel Page: no shortcode needed
- Digital downloads page: Requires the shortcode [ ngg_pro_digital_downloads ]
- Cart menu icon: Determines the appearance of the Checkout page selected above when shown as an entry inside a menu. When a setting other than None is selected, the checkout page will be added to the first navigation menu registered by your theme.
- Icon Only
- Icon Only (When the cart has items)
- Icon & Total
- Icon & Total (When the cart has items)
- “Not for sale” message: Set the message that will appear in place of the cart option for images marked not for sale.

- Studio Information
- Studio Name: If you don’t own a Studio feel free to use your own name.
- Studio Street Address.
- Studio Address Line #2.
- Studio City.
- Studio Country.
- Studio State.
- Studio Zip or Postal Code (required for taxes and Automatic Fulfillment items).
- Studio Email.

- Shipping
The cost of shipping is set at your pricelists under Ecommerce Options > General Options. You can set it by ‘Flat Rate’ or ‘Percentage’.
- Enable sales tax is a flat rate that will apply for everyone regardless of their location (optional). We use an API from taxjar that will calculate the total tax from your studio zip code and the customer’s zip code. You must have your studio information filled.
More information on taxes here: https://www.imagely.com/docs/intro-to-sales-tax/

- Use cookies for cart storage: Cookies are adequate for most customers but can only hold a limited number (around 30) of products due to browser limitations. When disabled the browser localStorage API will be used which does not have this limited number of products in your shopping cart; but cart contents will be different on ‘example.com’ vs ‘www.example.com’ as well as across HTTP/HTTPS.
- Hide coupons on checkout: when turned on will hide the option to insert a coupon at checkout.
E-MAIL
Set your order notification subject, email and message to notify you (the seller) of any new purchases made. You also have the option to send the customer a receipt of purchase. You may customize the message or leave it at the default message.

- Order notification e-mail subject: Subject / seller e-mail.
- Order Notification e-mail content: Content / seller e-mail.
- Send e-mail receipt to customer?: You can enable or disable sending an e-mail to your customer (buyer).
- E-mail subject: Subject / customer e-mail.
- E-mail content: Content / customer e-mail.
ACCEPTED PLACEHOLDERS
If you decide to customize the notification message, here are the parameters you can include:
Note: Wrap placeholders in %%param%%
| Seller notification: |
Customer notification: |
| customer_name |
customer_name |
| email |
email |
| total_amount |
total_amount |
| item_count |
item_count |
| shipping_zip |
shipping_street_address |
| shipping_country |
shipping_city |
| order_id |
shipping_state |
| order_details_page |
shipping_zip |
| admin_email |
shipping_country |
| blog_name |
order_id |
| blog_description |
hash |
| blog_url |
order_details_page |
| site_url |
admin_email |
| home_url |
blog_name |
|
blog_description |
|
blog_url |
|
site_url |
|
home_url |
PAYMENT GATEWAY

You have 6 payment options for checkout:
- PayPal Checkout.
- PayPal Express Checkout (deprecated).
- PayPal Standard (deprecated).
- Stripe.
- Testing Gateway.
- Checks.
Note: PayPal Express Checkout and PayPal Standard are deprecated.
PayPal Checkout
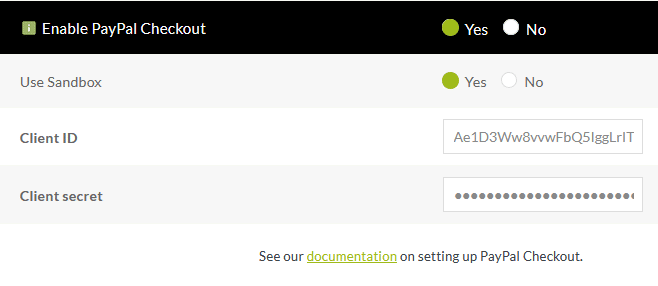
Paypal offers multiple ways to link to Paypal for checkout. Historically, NextGEN Pro has offered Paypal Standard and Paypal Express Checkout. While we still offer these, Paypal is slowly phasing them out, and replacing them with Paypal Checkout. This article will show you how to set up Paypal Checkout as your payment gateway: https://www.imagely.com/docs/how-to-setup-paypal-checkout/
Stripe
For stripe you’ll need a public key and a private key. More information on stripe setup can be found on their website here, including signup instructions: Stripe – Getting Started where ou can grab your Stripe API Key. Stripe does not provide a sandbox option within our settings. If you want to test the checkout process you will need to set this up manually following the instructions on their website: Stripe-Testing.
Check if Stripe is available in your country: https://stripe.com/global

Testing Gateway
Enables a gateway that does not collect payments and sends users directly to their order confirmation (just for testing, please, disable this method on live sites).
Checks
If you would like to offer an option to pay and pick up in store, pay by check would be a great option to offer.

PRINT LAB INTEGRATION
If you wish to process lab fulfilled orders, you must provide a credit card that that will be billed for the cost of goods for orders fulfilled by the print lab. When a customer purchases a print, the cost of prints will be immediately charged to this credit card and order submitted to WHCC to be fulfilled.
You should include your credit card information, expiration date, and CVC number (on the back of your card). After you have completed that information, click on the button “Update”.
Note: you can also remove and re-insert a new card in case your card has expired.

PROOFING
Proofing allows your clients to select which images they’d like you to process and set up for ordering.
- Confirmation Page: This page requires the Oops! This page usually displays details for image proofs, but you have not proofed any images yet. Please feel free to continue browsing. Thanks for visiting. shortcode, which will be automatically added if not already present. Selecting “Create new” will create a new page.
- Trigger text: text used by the submit button.
- Not found message: This is displayed to users viewing the proofing page without a valid proofing to view.
- Confirmation template: Edit the template of your buyer’s email notification. Possible substitution fields: user_name, user_email, proof_link, proof_details. Wrap placeholders in %%param%%.
- Send confirmation to users: You can enable or disable to send a notification to the final users letting them know that they have submitted their proofing.
- Admin email message: Edit the template of your seller’s email notification.
- Pro Lightbox icon Color: When the NextGen Pro Lightbox is active, an additional icon is added for image proofing. This controls the color of that icon for chosen images (a small star).