Search for answers or browse our knowledge base.
Installing and Updating NextGEN Gallery
There are two ways you can install and update NextGEN Gallery. Automatically (easiest) or manually:
AUTO INSTALL
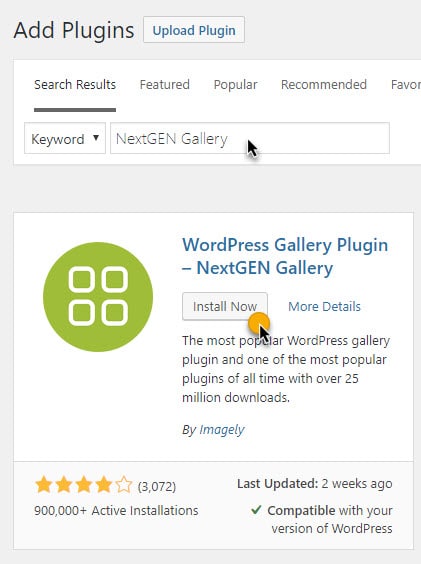
Go to Plugins >> Add New > search 'NextGEN Gallery' click 'Install'

Once the install process is complete, click 'Activate' and you're done!
Manual Install
Installing NextGEN Gallery manually requires knowledge of FTP and the awareness that you may put your site at risk if you install the plugin incorrectly.
Backup your site completely before proceeding.
To install a WordPress Plugin manually:
1) Download NextGEN Gallery .zip file to your desktop.
2) Extract the Plugin folder to your desktop.
3) Read through the "readme" file thoroughly to insure you follow the installation instructions.
4) With your FTP program, upload the NextGEN Gallery folder to the wp-content/plugins folder in your WordPress directory on your server.
5) Go to your WordPress Dashboard >> Plugins and find the newly uploaded plugin in the list.
6) Click Activate plugin to activate it.
-
UPDATE NEXTGEN GALLERY
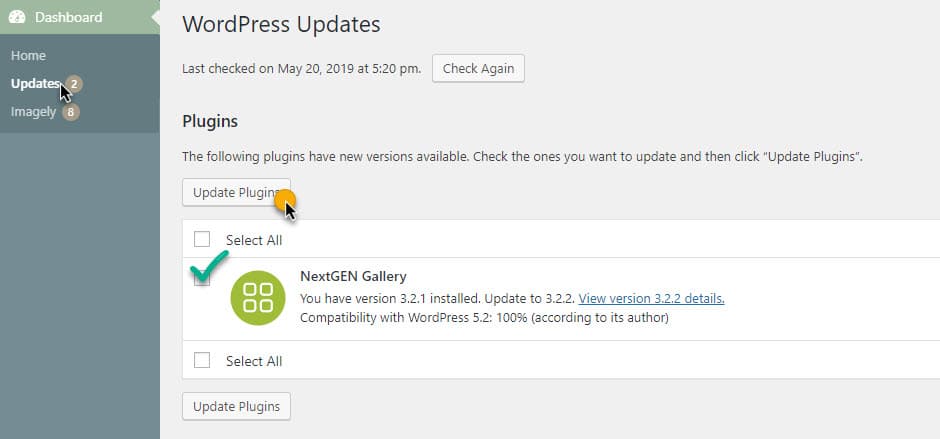
Go to Dashboard >> Updates > Select all plugins that have updates available (or at least NextGEN Gallery) and click 'Update Plugins'

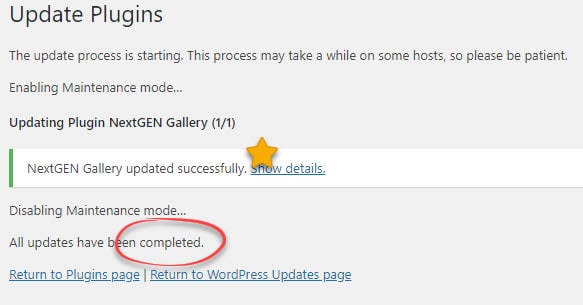
Important to allow the process to complete, the last notice you should see that will confirm the update was successful will appear like this:

Update Manually
Once you have the plugin successfully installed you shouldn't have to update manually. But if you wish to proceed with a manual update, updating manually is similar to installing manually, except you will be replacing/overwriting the original files in wp-content/plugins/nextgen-gallery/... with the new files.
Important: Installing or Updating the plugin manually requires knowledge of FTP / familiarity with managing files on your server. We suggest using the FTP program Filezilla to manage your server files.
