You can either sell or provide free downloads of your images with Digital Downloads! In this document, we will explain how to set up Digital Downloads in your gallery. Please, notice that this option is available only in our NextGEN Gallery Pro plugin.
These are the basic steps:
- Setup your NextGEN Gallery Pro Ecommerce Settings.
- Create a Gallery using the right dimensions.
- Create a Digital Downloads Pricelist.
- Add a Pricelist to the Gallery.
- Enable NextGEN Pro Lightbox Effect.
- Insert that Gallery with the Ecommerce option on.
Set up your NextGEN Gallery Pro Ecommerce Settings
NextGEN Gallery Pro requires a basic configuration in order to work if you are going to enable Digital Downloads in your gallery. Here is the whole documentation explaining how to set up your Ecommerce Settings
Go to Ecommerce > Ecommerce Set Up
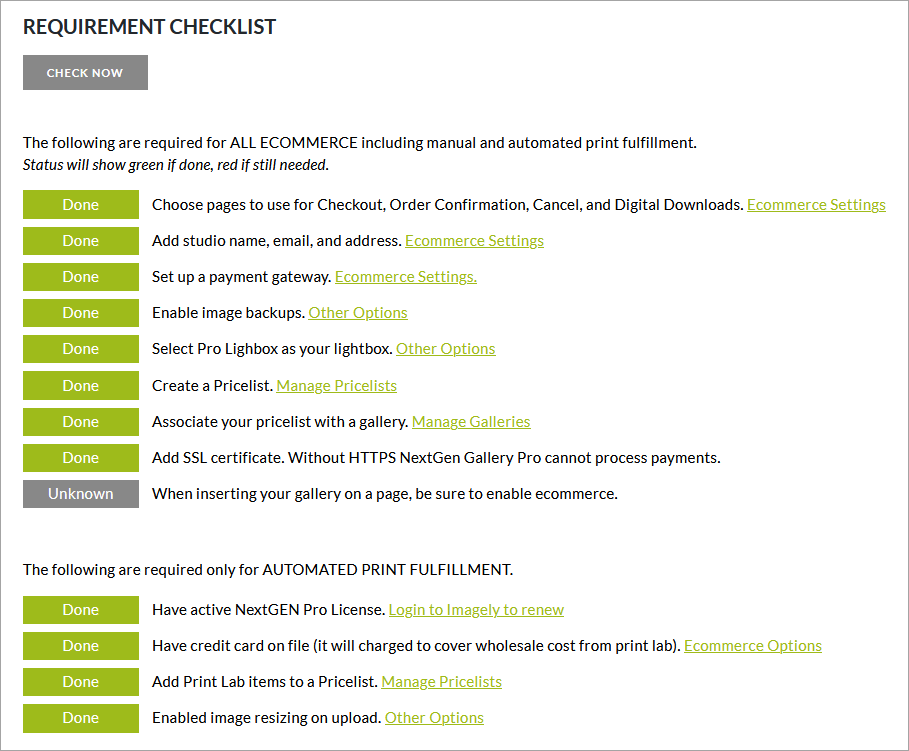
Your Requirement Checklist should look like this.

Create a Gallery using the right dimensions
Gallery Settings
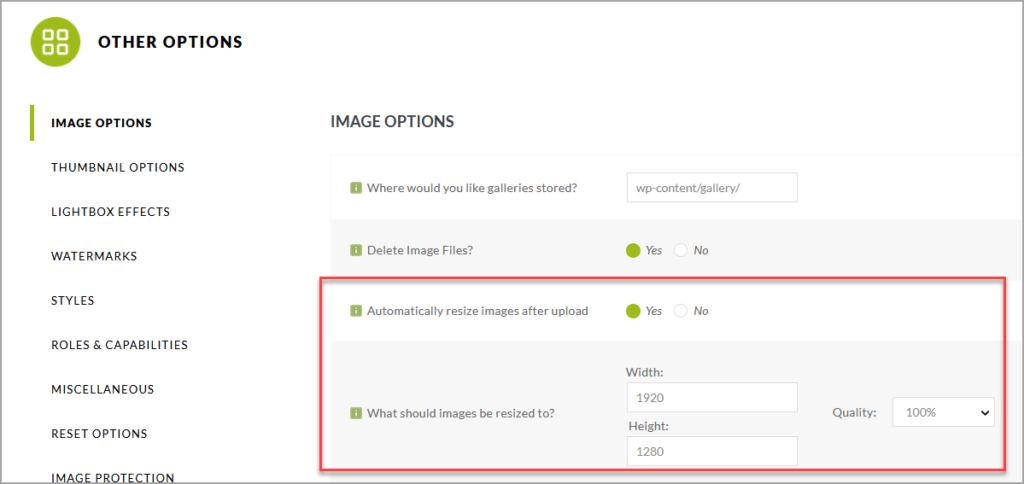
You will need to upload your full-resolution images and NextGEN Gallery should resize them for you. Before uploading, make sure that ‘resize on upload’ is turned ON and ‘backup images’ is turned ON under Gallery > Other Options > Image Options.

Please, take these into consideration before uploading your files:
- Use JPG as the File format.
- Use sRGB as your Color profile.
- Dimensions: Full-resolution means the max size available for sale or download on your site. Try to upload a realistic size, you can use this Minimum resolution table as a guide to provide the correct dimensions, but for example, a 2250×3750 pixels is okay.
More information here: Image Sizes and Resolutions https://www.imagely.com/docs/image-sizes-and-resolutions/
Upload your Photos
If you need to learn how to upload your photos, here is a very useful link: Adding Images (Uploading/Zip Files/Image Folders)
Create a Digital Downloads Pricelist
Please check our complete guide on How to Create a Pricelist.
Add a Pricelist to the Gallery
For a complete guide about how to add pricelist to your galleries, you can check this link
Enable NextGEN Pro Lightbox Effect
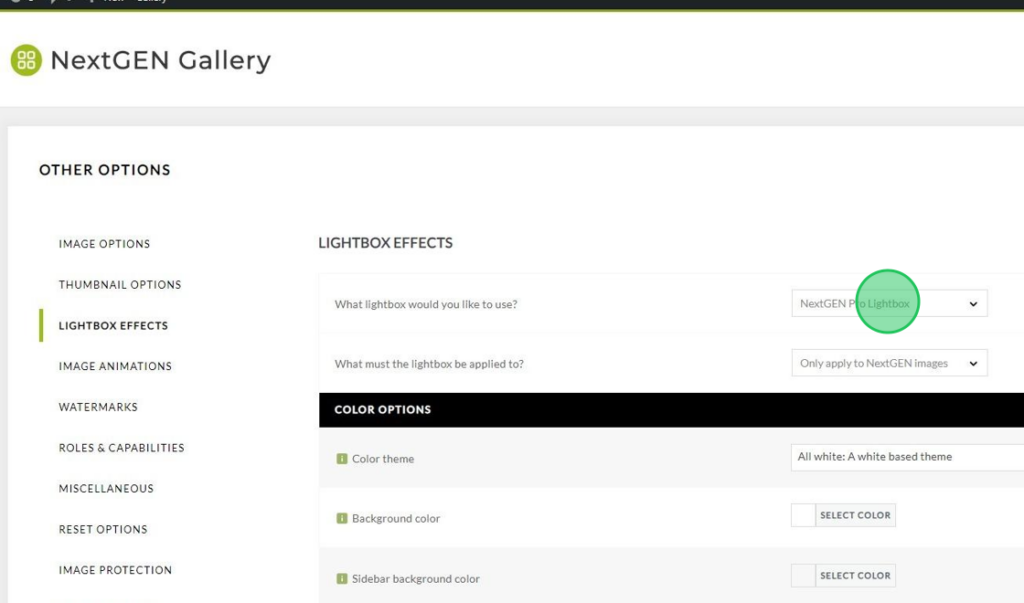
First go to NextGEN Gallery > Other Options > Lightbox Effects. On What lightbox would you like to use? Select NextGEN Pro Lightbox. Save that setting by clicking on Save Options.


Insert that Gallery with the Ecommerce option ON
You can insert that gallery with Digital Downloads items into a page or blog post. Here is a screenshot of our placeholder, (it’s a small icon available in your WordPress editor). Once you click on that you are going to see our placeholder, Click on the Add NextGEN Gallery button.

Now choose the gallery that you would like to include, in this example, it is called Sample Gallery 001, and then choose a gallery display.


Then on the Customize Display Settings tab

Look for the option Enable ecommerce?, choose Yes. Then, click on the Insert Gallery button.

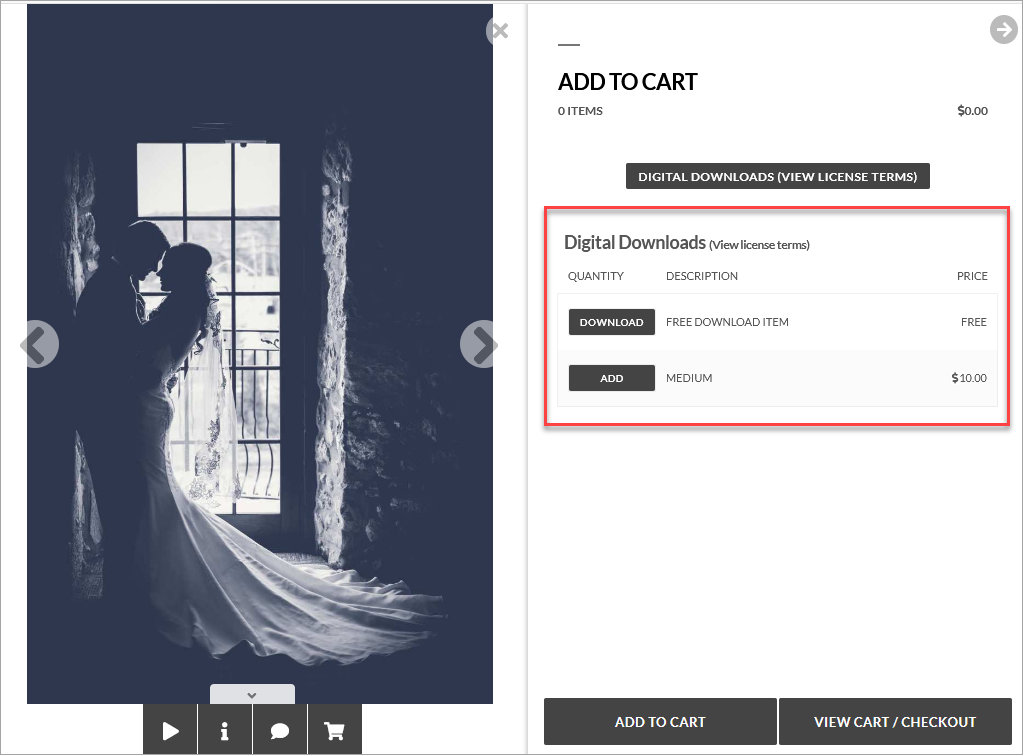
Finally, once you update your blog post or page, this is the final result. Here are the two available Digital Downloads items for your photograph. NextGEN Gallery will resize them to the defined dimensions, and since the Free download option is enabled, your clients can download the free image from our Lightbox directly.

