Search for answers or browse our knowledge base.
How to install your NextGEN license
NextGEN Pro, NextGEN Plus and NextGEN Starter are premium extension plugins for NextGEN Gallery.
NextGEN Gallery is required in order to run NextGEN Plus or Pro or Starter.
What is the difference between NextGEN Gallery Pro and Plus?
NextGEN Plus has all the same gallery features as NextGEN Pro minus eCommerce. Some users want all the beautiful premium gallery displays but do not require eCommerce. This is why we provide the NextGEN Plus option.
Requirements
- Meet our plugin's minimum requirements.
- Access to your WordPress dashboard.
- NextGEN Gallery installed and active (our free and core plugin).
- An active subscription of NextGEN Gallery Pro or NextGEN Gallery Plus.
Installing Starter, Plus and Pro for the first time
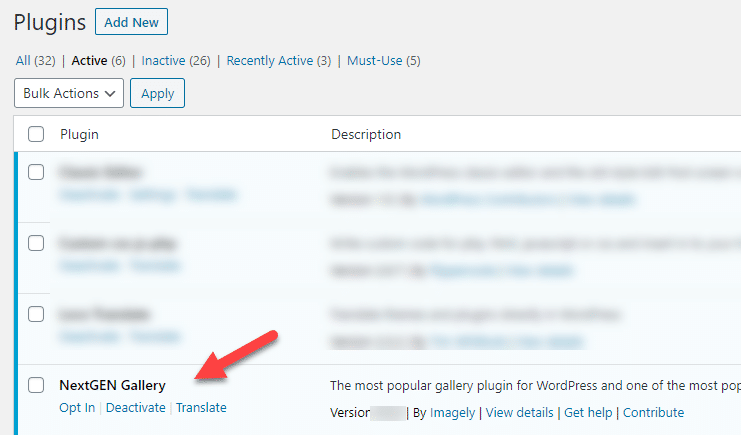
- Check if you have NextGEN Gallery installed and active. In your WordPress dashboard, you can check that under Plugins > Installed plugins
You can check NextGEN Gallery's changelog to ensure you have the latest version.

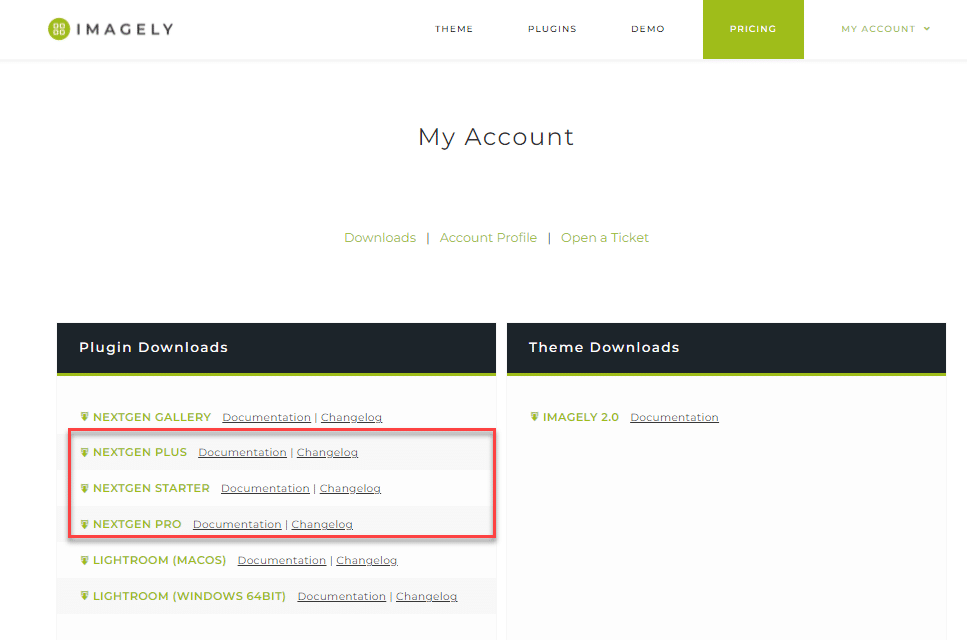
- Download NextGEN Gallery Pro or Plus or Starter from your account member's area.
- Make sure that the browser you are using does not automatically unpack the .zip file for NextGEN Pro or Plus or Starter. We would suggest using Google Chrome or Firefox to download.
- Download the .zip file to your desktop or an easy area to access it.

- You have two ways to install your plugin: directly from your WordPress dashboard or through FTP.
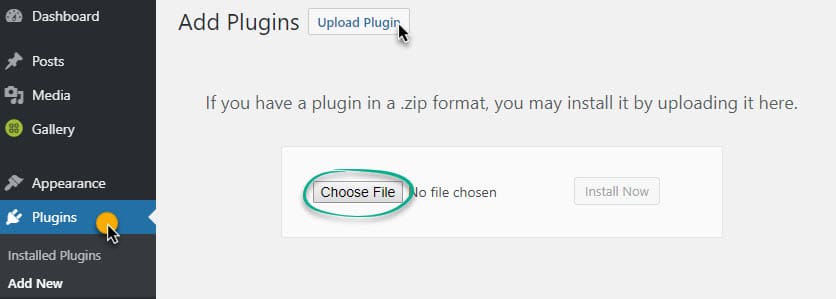
- Go to your WordPress dashboard > Plugins > Add New > Upload, browse and select your .zip file for NextGEN Pro/Plus/Starter and then click 'Install Now'.

- - Once WordPress is finished installing, click 'Activate Plugin'.

- You're done!
Note: for instructions on how to install the plugin manually over FTP, you can read more here "Manual Plugin Installation".
Create your galleries
Learn how to create galleries, manage galleries, and modify settings here: NextGEN Gallery documentation.
To learn how to make use of Pro/Plus features, follow the instructions for Pro Galleries, Pro Albums, and Pro Lightbox here:
- NextGEN Pro Tile Gallery.
- NextGEN Pro Thumbnail Gallery
- NextGEN Pro Slideshow Gallery
- NextGEN Pro Filmstrip Gallery
- NextGEN Pro Film Gallery
- NextGEN Pro Blog Style Gallery
- NextGEN Pro Masonry
- NextGEN Pro List Album
- NextGEN Pro Grid Album
- NextGEN Pro Lightbox
Problems during the installation process?
The install is usually really simple, but sometimes you need a bit of help
- Make sure that both NextGEN Gallery and your Pro or Plus or Starter plugin are installed and active.
- Try to clear or purge any plugin cache you have installed.
- Check for existing conflicts with other plugins or your theme.
If the problem persists, please, contact a support agent (you need an active subscription).
