Looking to make your WordPress site more interactive? Allowing visitors to comment on a photo in your gallery is a powerful way to engage visitors and build a community around your photography. Whether you’re showcasing a wedding portfolio or sharing travel photography, enabling comments for images can transform your gallery from a simple display into an interactive experience.
In this guide, we’ll walk you through how to create a WordPress photo gallery with comments, helping you boost engagement and create meaningful connections with your audience.
Why Should You Let Visitors Add Comments to Website Photos?
When you’re running a photography website, driving engagement can be challenging. Let’s explore why enabling comments on your photo galleries is worth considering.
- Boost Engagement and Time on Site: When visitors can comment on your photos, they’re more likely to engage deeply with your work. Instead of just browsing through images, they can share their thoughts and reactions, leading to increased time spent on your site and better engagement metrics.
- Gain Valuable Feedback and Insights: Comments provide direct feedback about your photography from actual viewers. Whether you’re a professional seeking client input or an enthusiast looking to improve, these insights can help shape your creative direction and business decisions.
- Improve Search Engine Rankings: Adding comments to your galleries creates fresh, user-generated content that search engines love. Each new comment adds unique content to your site, which can help improve your search rankings and visibility over time.
- Create a Vibrant Community Perhaps most importantly, comments transform your gallery from a simple portfolio into an interactive community space. They encourage discussion, foster connections between visitors, and help build a loyal following around your photography.
While beautiful photos are essential, adding interactive features like comments can significantly enhance the user experience. When visitors are able to share their thoughts on your images directly, it can positively influence others’ perceptions of your business.
How to Create a WordPress Photo Gallery with Comments
Let’s walk through the process of creating an interactive photo gallery with commenting enabled. We’ll cover everything from initial setup to customizing your comment settings.
First, you’ll need NextGEN Gallery. With over 32 million downloads, it’s the most popular gallery plugin for WordPress. It makes building beautiful, responsive galleries a snap. The plugin comes with tons of customizable gallery layouts and offers a built-in lightbox with image commenting.
Aside from image comments, the plugin is also packed with powerful features for photographers and visual artists, such as:
- Client proofing
- eCommerce options to sell digital downloads and prints with automated print fulfillment
- Deeplinking for better SEO
- Filterable galleries and albums
- Image protection and watermarking
- Adobe Lightroom integration to create and manage WordPress galleries straight from Lightroom
- Image optimization with automatic resizing and lazy loading
- Gallery animations and hover captions
- And more!
To get started, head to the Imagely pricing page and choose a license level. You’ll need a Plus license or above to enable comments for images.
Whether you just want a simple gallery to get feedback on a few photos or a full-featured solution to display your portfolio, sell photos, and manage your photography business, Imagely has you covered.
Step 1: Install NextGEN Gallery
To get started, you’ll need to install the plugin on your WordPress site. Begin by downloading the NextGEN Gallery Plus or Pro ZIP file after purchase. Then, head to your WordPress site, log in, and navigate to Plugins » Add New Plugin.
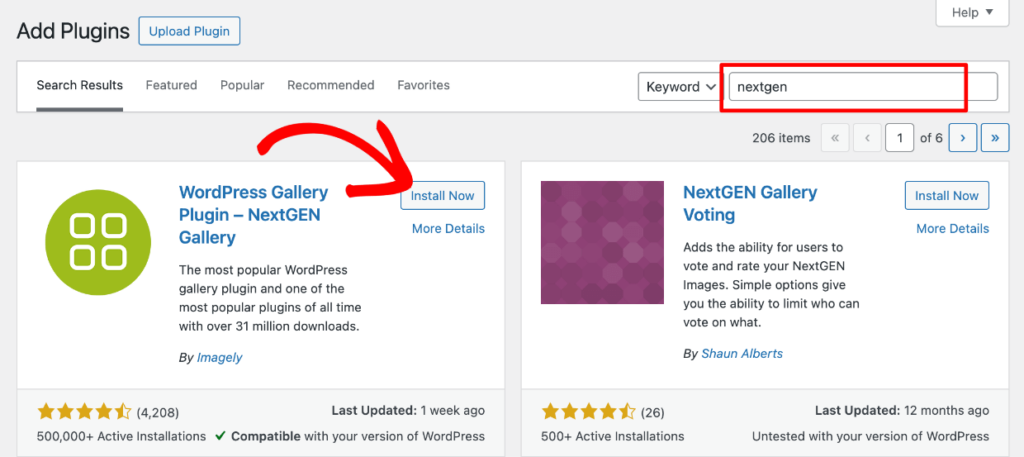
Premium versions of NextGEN Gallery work on top of the free version, so we’ll first need to install the Lite plugin. Type “NextGEN” in the search bar to find it. Then, press Install Now and Activate after the button changes.
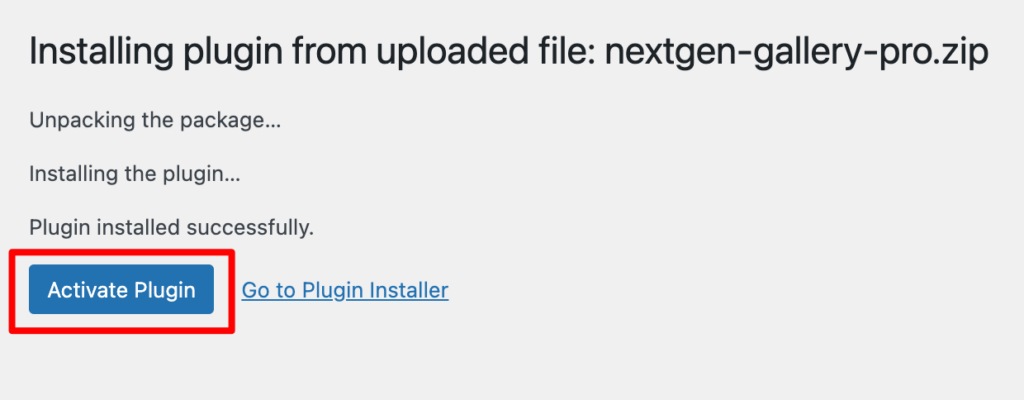
Once that’s done, click Upload Plugin at the top of the same screen and install the premium ZIP file for NextGEN Plus or Pro that you downloaded after purchase. Make sure to press Activate after it finishes installing!
After you installed the Lite version, you were likely guided through a setup wizard where you could provide your premium license key. However, you can also activate your license by going to NextGEN Gallery » Other Options and clicking the License Key tab at the bottom of the menu. Paste your license and press Verify Key.
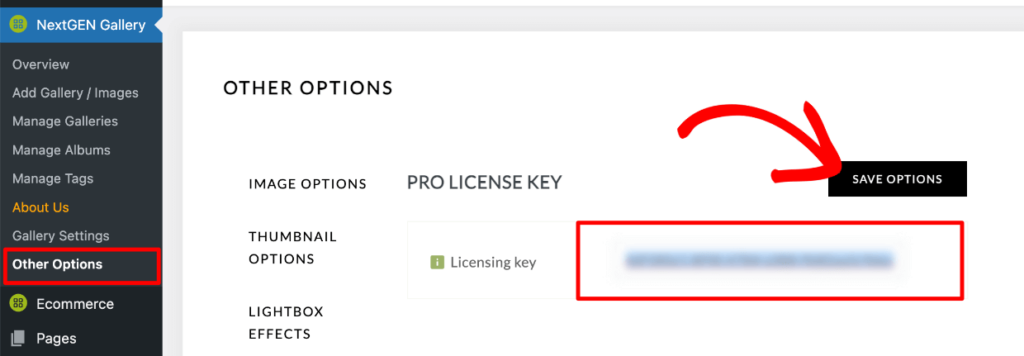
If you need additional help with installing and setting up the plugin, see our documentation.
Step 2: Enable Image Comments
Now it’s time to enable comments on your galleries. Navigate to NextGEN Gallery » Other Options » Lightbox Effects in your WordPress dashboard. From the dropdown menu, select NextGEN Pro Lightbox as the type of lightbox to use (this is required for the commenting feature to work properly).

Then, scroll down until you find the Social section. Here you’ll see an option to Enable comments, which you should set to Yes.

You can also configure whether to Display comments initially or not. If displayed initially, the commenting sidebar will automatically open in the lightbox. If not displayed initially, users will need to click the comment icon in the bottom of the lightbox to view and add comments to website photos.

You can also customize other lightbox settings and turn on social sharing buttons to show at the top of the comments sidebar. When you’re finished, click Save Changes at the top of the page to preserve your settings.
Step 3: Add a Gallery with Commenting to Your Site
Any new or existing galleries will now use the Pro Lightbox, and visitors can easily comment on a photo in the lightbox. To add a gallery anywhere on your site, head to the post or page where you want to add it, click the + sign to insert a new block, and select the NextGEN Gallery block.
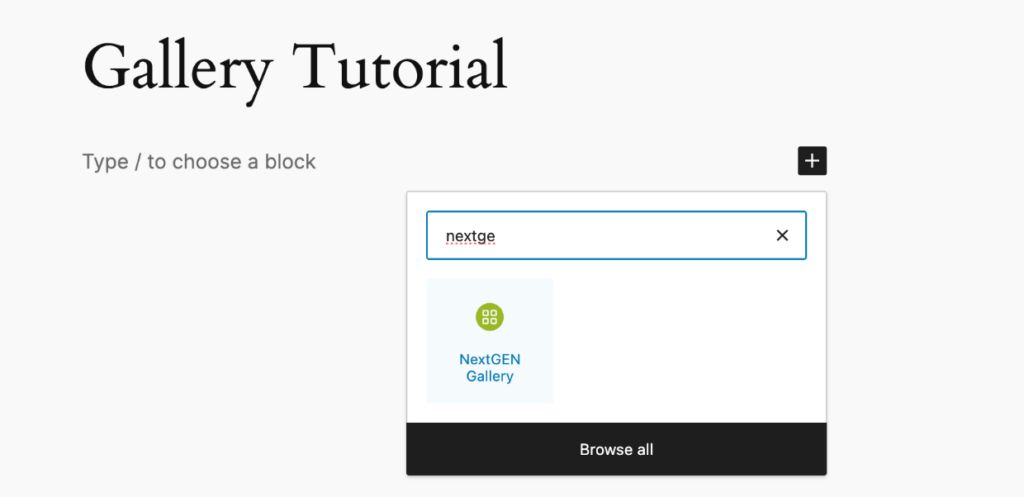
You’ll see the block on your page or post, and you can click the Add NextGEN Gallery button inside it. This will open a popup where you can select an existing gallery or create a new gallery using the Upload Images tab.
Use the dropdown menu on the Insert Into Page tab to choose the gallery you want and select your layout.
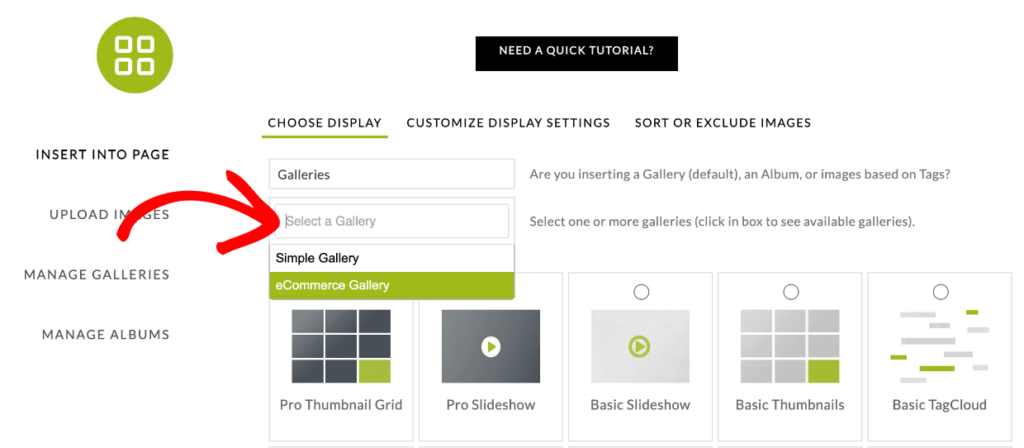
To override any of your default settings for the selected layout, you can click Customize Display Settings at the top.
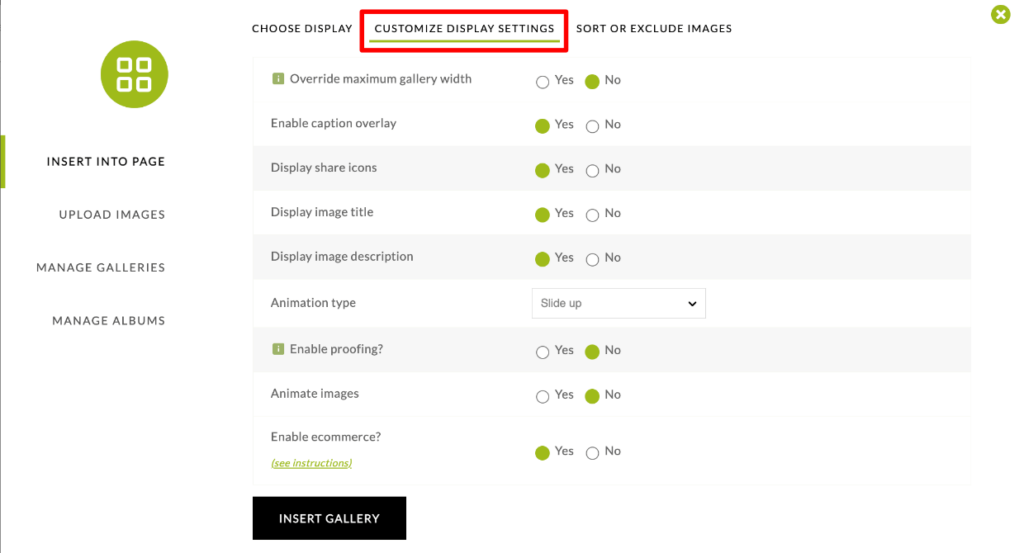
When you’re finished, click Insert Gallery at the bottom. Lastly, make sure to Publish your changes in the WordPress editor. Now, you can go to that page on your site to see your new gallery with image comments!
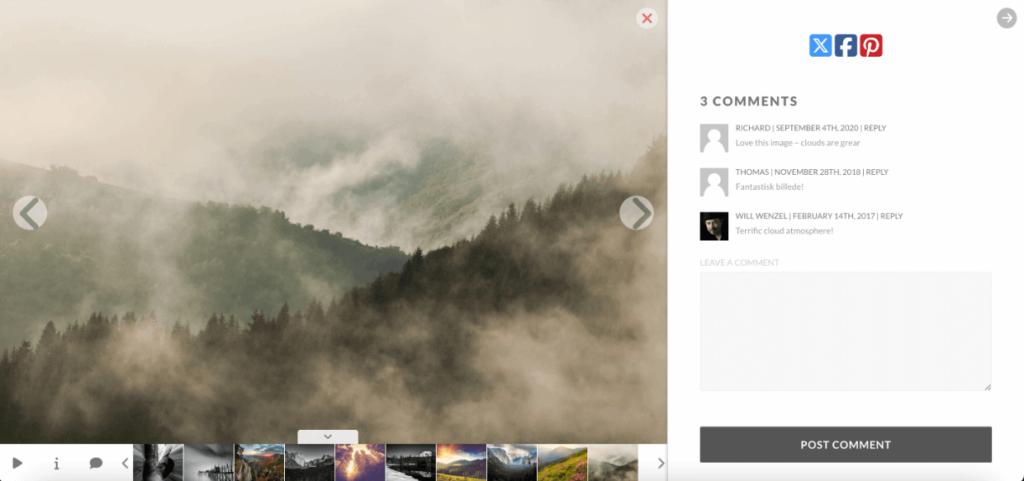
Pro Tip: Take time to organize your images and add relevant titles and descriptions, as these details can help spark conversation in the comments.
Step 4: Moderate and Respond to Comments
Once visitors start commenting on your images, you’ll find that managing these comments works exactly like regular WordPress comments. You can view, moderate, and respond to all comments directly from your WordPress dashboard.
When you select Comments from your dashboard menu, you’ll see both regular post comments and photo comments listed together. Each image comment will show which gallery it belongs to, making it easy to keep track of conversations happening across your galleries.

From here, you can approve or delete comments, mark them as spam, or reply directly—just like you would with regular blog comments. Genuine interaction encourages more comments and helps build a community around your work. We recommend checking your comments section regularly and responding to engage with your visitors.
Pro Tip: Consider enabling email notifications for new comments under WordPress Settings » Discussion. This helps you stay on top of the conversation and respond promptly to feedback or questions.
As you can see, allowing visitors to comment on photos in WordPress doesn’t have to be complicated! With NextGEN Gallery, you can quickly set up an interactive gallery that encourages visitor engagement and helps build your photography community.
If you enjoyed learning how to add commenting to website photos, be sure to check out our Expert Guide to WordPress Image Optimization.
Don’t have NextGEN Pro yet? Get started today!
Have questions about setting up your WordPress photo gallery with comments? Drop us a comment below! For more photography tips and WordPress tutorials, check out our blog.


