As a photographer, visual artist, or store owner, showcasing your work or product images on a WordPress website is essential for reaching a wider audience and growing your online presence. However, unoptimized images can significantly slow down your site, leading to a poor user experience and lower search engine rankings.
In this guide, we'll explore the best practices for WordPress image optimization and show you how NextGEN Gallery can help you take your site's performance to the next level.
Why does WordPress image optimization matter?
Image optimization is the process of delivering high-quality images to website visitors while minimizing file sizes. This practice is crucial for WordPress sites as images often account for the majority of data transferred when loading a webpage.
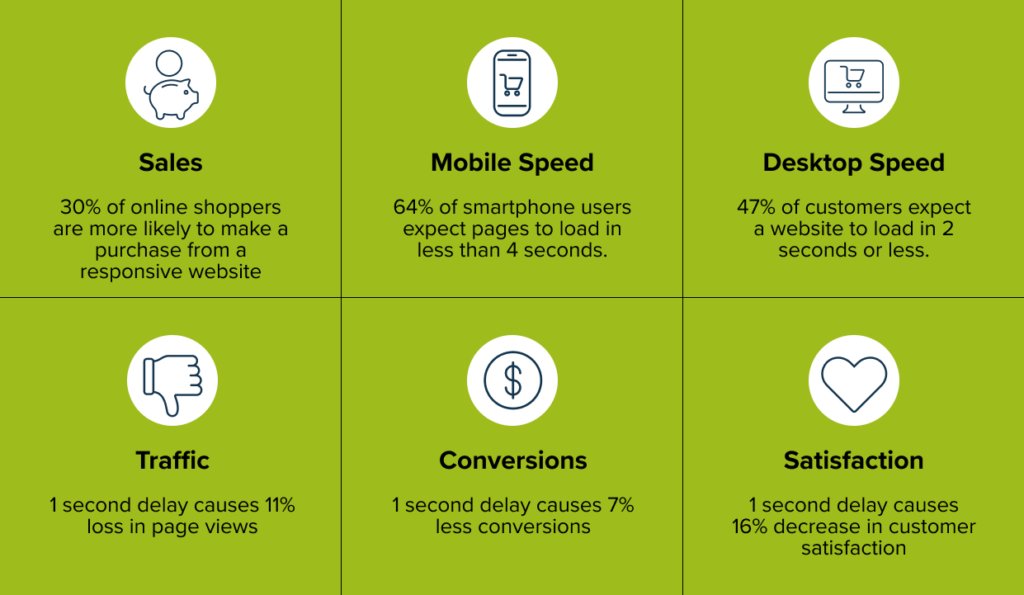
Slow-loading pages frustrate visitors, leading to higher bounce rates and reduced engagement metrics, like time on site or pages per session. Search engines also favor faster-loading pages, so image optimization is a key SEO tactic. In fact, bloated images can directly harm your site's visibility in search results.
How to Optimize Images for Web Display
Choose the Best File Format
When it comes to optimizing images for the web, choosing the right file format is crucial. The four most common image file formats are JPEG, PNG, GIF, and WebP, each with its own set of advantages and ideal use cases.
JPEG (Joint Photographic Experts Group)
- The go-to format for most photographic images and complex graphics with millions of colors.
- Uses lossy compression, which means some image data is discarded to reduce file size, but this loss is typically imperceptible to the human eye.
- Best for photographs, product shots, and other high-quality images where preserving color accuracy is important.
PNG (Portable Network Graphics)
- Lossless format that supports transparency.
- Ideal for logos, icons, and graphics with text or simple shapes on a transparent background.
- Tends to have larger file sizes than JPEGs, but they maintain image quality without any loss of data.
GIF (Graphics Interchange Format)
- Highly compressed format that supports animations and transparency.
- Limited to a maximum of 256 colors.
- Best for simple graphics, icons, and short animations but not suitable for photographic images or complex graphics.
WebP (Web Picture)
- Newer image format developed by Google
- Provides superior lossless and lossy compression for web photos compared to JPEG and PNG (up to 25-35% smaller than their JPEG equivalents while maintaining the same quality).
- Best for non-detailed images that are used exclusively for the web.
Additional Image Formats for Online Use
- SVG (Scalable Vector Graphics) is a versatile image format ideal for graphics and illustrations. It can scale infinitely without losing quality and is XML-based, allowing for easy editing with code. However, it often produces larger files and is not natively supported by WordPress.
- AVIF (AV1 Image File Format) is a next-generation image format that efficiently compress high-quality images, offering significant file size reduction while maintaining excellent visuals. It supports features like wide color gamut, HDR (High Dynamic Range), and transparency, but it is not yet supported by all browsers or Google Search, making it less ideal for websites that prioritize compatibility and image SEO.
Optimize Image Dimensions and Sizes
Choosing the right image dimensions and sizes is crucial for optimizing your WordPress website's performance and user experience. Different types of images serve different purposes, and using the appropriate dimensions can help strike the perfect balance between visual quality and load times.
- Featured Images: Sized around 1200-1500 pixels wide
- Maintain consistent and visually appealing layout
- Additional Images within Blog Posts: Around 600-800 pixels wide
- Ensure visual appeal without slowing down page load times significantly
- Product Shots on E-Commerce Websites: Typically around 1800-2000 pixels wide
- Showcase products in detail, provide smaller optimized versions for faster loading on category and listing pages
- Responsive and Retina Image Sizes:
- Responsive Images: Automatically adjusts dimensions based on viewport size for optimal viewing experience across devices
- Retina or High-Resolution Displays: Use images twice the size of intended display dimensions (e.g., 2400 pixels wide for a 1200-pixel wide image)
Resize Images Before They're Loaded on the Page
Whether you resize before upload, embed photos from another source, or use a WordPress plugin like NextGEN Gallery to automatically resize your WordPress images, the important thing is to be sure that the photos that load on the page are the smallest size needed.
- A common mistake is uploading large images and using CSS to scale them down to fit the desired display size. While this may visually appear the same, it still requires visitors to download the original, large image file, which slows down page load times.
- If you don't need to store the larger, original image files on your WordPress site, it's good practice to resize your photos before uploading. This not only ensures that your images are the correct dimensions but also helps reduce the overall bloat on your site.
Compress Images for the Web
After resizing your images, compress them to further reduce file sizes. It's important to find the right balance between compression and quality. While most tools are designed to preserve image quality, excessive compression can sometimes introduce visual artifacts or distortions.
Experiment with different quality settings to find an optimal file size that doesn't significantly impact visual quality.
- As a general rule, a quality setting between 60-80% is a good starting point for JPEGs, as it offers significant file size reduction without noticeable quality loss. Aim to keep your compressed image file sizes below 200KB for optimal performance.
- Compress your images in increments, checking the quality after each step. This allows you to find the sweet spot where the file size is significantly reduced without noticeable quality loss.
- Tools like Adobe Photoshop and Lightroom offer built-in compression features, allowing you to adjust the quality settings and preview the results before saving.
- Online image compression services like TinyPNG, Kraken.io, or Optimizilla can also be used to quickly compress images without the need for desktop software.
Just remember that size and compression levels can vary depending on the image dimensions, complexity, and your website's needs. Use your best judgment and test your website's load times to ensure a good balance between quality and speed.
Use Descriptive, SEO-Friendly File Names
Rename your images with descriptive file names
Before uploading your images to WordPress, take a moment to rename them with descriptive, keyword-rich file names. This helps search engines understand the content of your images and can improve your chances of appearing in image search results.
- For example, "sunset-beach-photography.jpg" is much better for SEO than a generic file name like "IMG_1234.jpg"
Use hyphens to separate words
When creating file names for your images, use hyphens to separate words instead of underscores or spaces. Search engines treat hyphens as word separators, making it easier for them to parse and understand the content of your image file names.
- For example, "sunset-beach-photography.jpg" is more SEO-friendly than "sunset_beach_photography.jpg" or "sunset beach photography.jpg"
WordPress Image Optimization with NextGEN Gallery
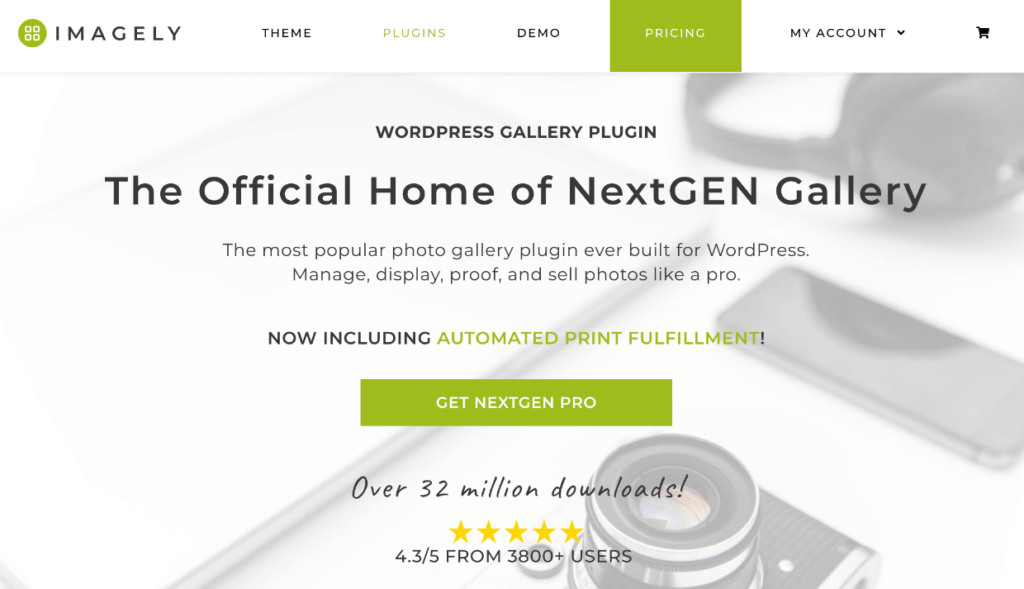
NextGEN Gallery is a powerful WordPress plugin that helps photographers showcase their work through customizable galleries, sell digital images and prints, manage client proofing, and more. Aside from gorgeous portfolios and advanced eCommerce features, the plugin offers a robust suite of tools to boost engagement, improve website SEO, and optimize images for WordPress.
Automatic Image Resizing
One of the key features of NextGEN Gallery is the ability to resize images automatically after upload. By turning on the "automatically resize images after upload" and "back up the original images" options, you can ensure that your website displays optimized, fast-loading images while preserving the original, high-quality versions.
- When you upload an image, NextGEN Gallery creates a backup of the original, full-size file.
- It then creates a resized copy of the image based on your specified dimensions.
- The resized copy is what gets displayed to visitors on your website, ensuring fast load times.
- However, because the original backup is preserved, you can always revert to the full-size version if needed. (e.g., for delivering digital downloads, print orders, or non-watermarked photos).
Pagination and Lazy Loading
You can use pagination and lazy loading options to significantly speed up loading times on your galleries, especially those with a lot of images.
- Pagination: Creates multi-page galleries that only load images on the current page. You can also use Ajax pagination gallery pages dynamically load without having to reload the entire web page.
- Lazy loading/infinite scroll: Loads additional images as users scroll down the page, rather than rendering them all at once.
Deep Linking and SEO
NextGEN Gallery also supports deep linking, which creates a unique URL for every individual image. That means you can easily link to a specific image without sharing the whole gallery. It's also an excellent feature for SEO since it enables search engines to index individual images within a gallery.
Image Optimization Checklist
Creating an optimized and high-performing WordPress site requires a comprehensive approach to image optimization. Here's a handy guide to ensure you cover all the essential aspects.
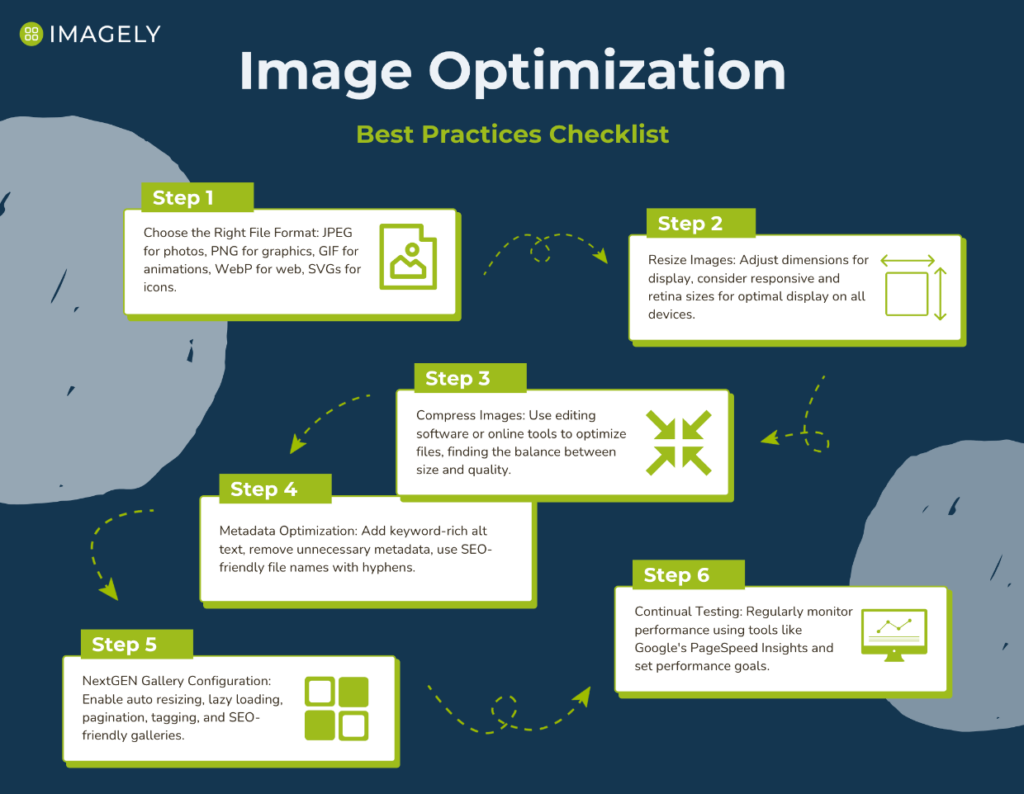
By following this checklist and leveraging the advanced features of NextGEN Gallery, you can ensure that your WordPress site delivers an exceptional user experience with optimized images that load quickly and seamlessly.
Frequently Asked Questions:
How do I find the right balance between image quality and file size?
Start by determining the maximum display size needed for your images based on your website's layout. Then, use image compression tools to reduce file sizes while maintaining an acceptable level of visual quality. A good starting point is to aim for a quality setting between 60-80% for JPEGs and a maximum file size of 200KB. Test your website's load times and visual appearance to fine-tune these settings based on your specific needs.
What's the difference between lossy and lossless image compression?
Lossy and lossless compression are two different methods for reducing image file sizes. Lossy compression, used by formats like JPEG, removes some image data to achieve smaller file sizes, which can result in a slight loss of quality. Lossless compression, used by formats like PNG, compresses the image without losing any data, maintaining the original quality but resulting in larger file sizes compared to lossy compression. In most cases, lossy compression is preferred for web images, as it offers a better balance between file size and visual quality.
Do I need to optimize my images if I'm using a content delivery network (CDN)?
Yes, even if you are using a CDN to serve your images and other static files, it's still important to optimize your images before uploading them to WordPress. CDNs can help improve your website's loading times by distributing your content across multiple servers and serving it from a location closer to the user. However, they don't optimize your images.
How can I optimize my WordPress website's overall performance?
Optimizing your WordPress website's overall performance involves a combination of strategies, including:
- Choosing a fast and reliable web hosting provider
- Using a well-coded, performance-optimized WordPress theme
- Minimizing the use of resource-intensive plugins
- Optimizing your images and other media files
- Installing a caching plugin
- Minifying your HTML, CSS, and JavaScript files
- Using a content delivery network (CDN) to serve your static files
- Regularly monitoring your website's performance and addressing any issues
We hope this guide helped you learn how to optimize images for WordPress so you can strike a perfect balance between visual quality and fast loading times. Be sure to also check out our article on 10 Best WordPress Gallery Plugins to Create Outstanding Visuals.
Don't have NextGEN Gallery yet? Get started today!
For more photography tips and WordPress tutorials, check out our blog.

