Creating a photography site is an effective way to promote your business and showcase your work, but your photography website design also plays a pivotal role in how visitors perceive your brand. To stand out in such a competitive market, you need to use a strategic approach and consider user experience (UX), visual appeal, functionality, and more when designing your site.
As a blogger in the photography space, I can’t tell you how many sites I’ve come across that are sorely lacking when it comes to design. Even if you’re an incredible photographer, a poor website design can seriously damage your credibility. On the other hand, a well-designed website can do wonders for your photography business and help you attract new clients.
In this article, we’ll provide actionable tips on how to design a photography website that’s both visually appealing and highly functional. Whether you’re building your photography portfolio for the first time or looking to revamp an existing site, these design tips for photographers will help you create a site that resonates with your audience.
Guide to Website Design for Photographers
- 1. Start with a Cohesive Brand Strategy
- 2. Keep the Design Minimal and Focused
- 3. Ensure Consistent Branding Across All Mediums
- 4. Place Important Elements Above the Fold
- 5. Optimize for Usability and Mobile Responsiveness
- 6. Create Stunning, Optimized Photo Galleries
- 7. Avoid Common Mistakes & Regularly Update Your Site
- 8. Leverage the Power of NextGEN Gallery
1. Start with a Cohesive Brand Strategy
As a creative, “brand strategy” or “design synergy” might seem like stuffy marketing talk. However, it’s a crucial element to consider when it comes to your site. After all, your photography website is often the first impression you’ll make on a potential client, and 94% of those first impressions are based on site design.
When visitors land on your site, they should immediately understand what your photography is all about. This involves more than just choosing a color scheme; it’s about curating a consistent visual style that aligns with your brand as a photographer.
To start developing your brand design, first think about what feelings your photography evokes. And get specific – does your wedding photography feel candid, light, and airy, or dramatic, luxurious, and royal?
After you’re clear on the type of photographer you are, curate a mood board or a similar collection to help you further define the aesthetic and emotional tone. Once you have a solid idea for your approach, think about how it translates to font and color choices.

Your logo is another key branding element and will also serve as your watermark. As a photographer, your business is likely your name, so creating a signature logo is often a good choice. You can design a custom signature or select a clear-to-read font. Check out other photography website designs for inspiration, and remember that you don’t have to go overboard.
The more your site aligns with your brand, the more likely it is to make visitors stick around and see what you have to offer. At the very least, there’s comfort in having a clear, focused style for your business.
Key Takeaway
- Determine the feeling you want to convey to visitors and what message your photography sends.
- Make sure your logo, typography, and color choices match your tone and messaging.
- From there, you can start getting more creative with how you evoke your photography brand’s energy within your web page designs.
2. Keep the Design Minimal and Focused
For a photographer’s website, less is often more. We can all agree that your photographs should be the star of the show. As such, any other elements that distract from your images or your overall goal to convert visitors to clients should go in the trash.
For example, using constant animations on your portfolio page will detract from your work (plus it’s annoying). Similarly, if you include a lot of buttons or more than one visible CTA (call-to-action) at a time, it can confuse and distract users, potentially costing you a client or sale.
That’s not to say you can’t use elements like animation in your website design, but they should be pared down and optimized for UX. For instance, NextGEN Gallery lets you add animations to your galleries that only trigger on the initial load or when visitors click a new page in the gallery. This can be a great way to add flair that engages users without hindering the browsing experience.

Lastly, we’ll mention a design element that should be absolutely stamped out. If you’re considering adding background music to your site, don’t! It’s jarring when browsing in a quiet setting, causes visitors to distrust your brand, and provides the ultimate distraction from your images. Many people will leave a website almost instantly if unexpected sounds start playing.
Key Takeaway
Get minimalist and avoid cluttered layouts. Decide whether each element, whether a paragraph, a headline, a button, or an animation, serves your photography or hinders it. If it doesn’t enhance the user experience, it’s best to leave it out.
3. Ensure Consistent Branding Across All Mediums
First, make sure the branding across your site is cohesive. Every page should have the same color scheme, typography, header, menu navigation, footer, button styles, etc. If you’re using WordPress to design your site, a photography-focused theme like Imagely makes it easy.
The Imagely theme offers dozens of pre-built templates optimized for photographers. You can easily import the layout you want, adjust your global styles, and customize it to your heart’s content.
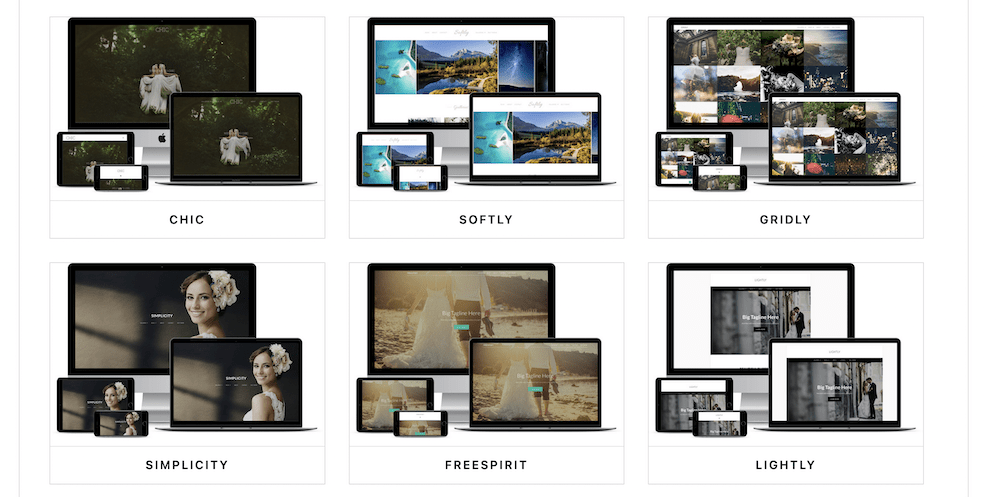
If you’re redesigning an existing site, double-check that all your pages and posts are updated with your new design. You don’t want visitors thinking they’re on a different website when they click a contact page or one of your photography blog posts that accidentally wasn’t updated.
Aside from photography websites, branding consistency extends to social media profiles, marketing materials, and even email signatures. Using the same fonts, colors, logos, and tone across all platforms communicates professionalism, reinforces your brand identity, and builds trust with your audience.

Tools like Canva can help streamline this process by allowing you to create custom web designs, print materials, and photography templates that you can use for your social media posts, business cards, and more. People will be much more likely to view your business in a positive light if you maintain a consistent look and feel across all your digital touchpoints.
Key Takeaway
- Make sure your photography website has a consistent design by using the same elements on every page to create a unified look and feel.
- Extend this cohesive branding to your social media and marketing materials to build a more memorable brand that will resonate with potential clients.
4. Place Important Elements Above the Fold
A popular rule of thumb in web design is to keep the most important elements on a page “above the fold.” This means the area of the site that’s visible without scrolling. Studies estimate that people spend about 57% of their time above the fold and 74% in the first 2 “screenfuls.”
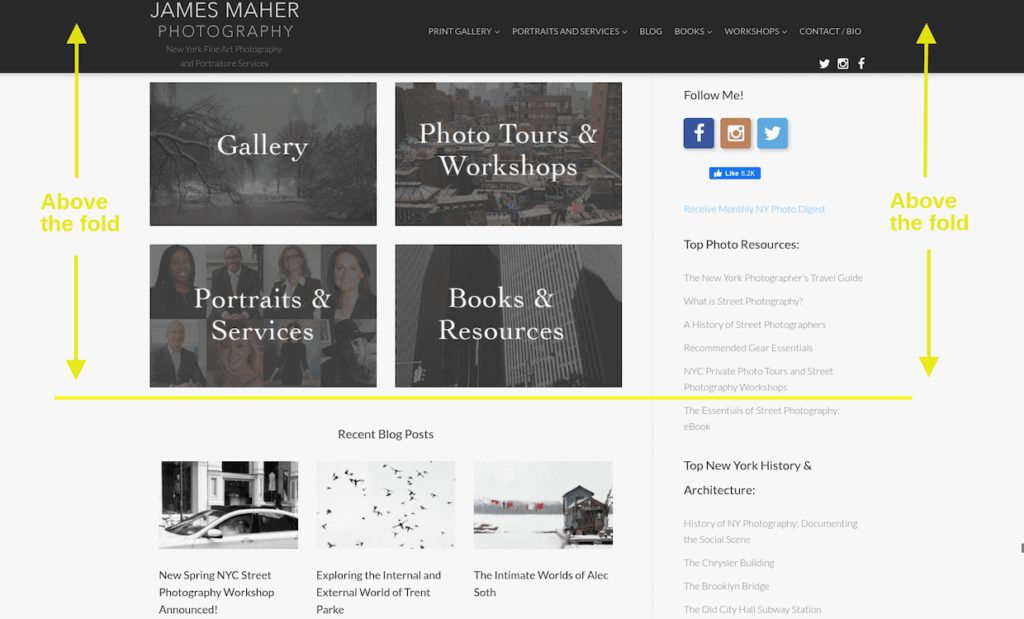
Of course, this isn’t always the case, and factors such as screen size come into play. However, even if it isn’t an exact science, the fundamental idea behind it makes sense. Some features you might consider including above the fold are:
- Contact information
- Portfolio and gallery links
- A brief description of your services
The goal is to have the information visitors most likely need readily available. Remember, first impressions are key, and strategically positioning your crucial elements creates a better user experience and encourages visitors to check out more of your site.
Key Takeaway
Make sure your photography website’s most crucial elements, such as your brand’s unique value propositions and compelling call-to-actions, are immediately visible above the fold. This will help visitors quickly understand what you offer and encourage them to further explore your site as soon as they arrive.
5. Optimize for Usability and Mobile Responsiveness
We’ve touched on user experience several times, but it deserves its own section. In today’s digital age, having a website that’s easy to navigate and fully responsive on mobile devices is non-negotiable.
A complicated or cluttered site will drive users away, so focus on usability. Start by creating a website that’s easy to navigate with a clear and organized menu that allows visitors to easily find your photography portfolio, about page, and contact details.
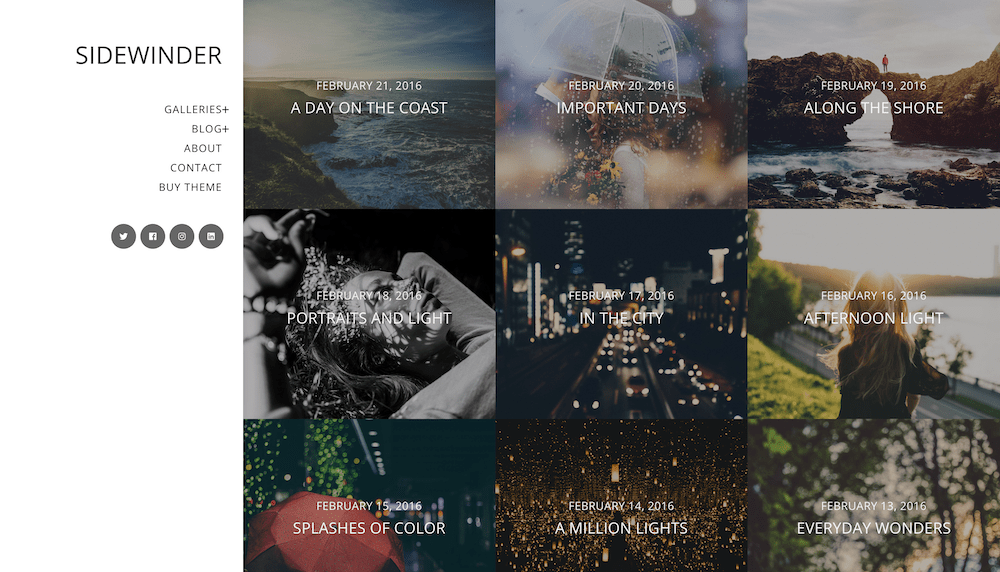
Years ago, when I first got interested in web design, I was all about visual aesthetics. I spent countless hours coding fancy flip cards that also worked as navigation to different portfolio sections on my site, only to have the first person I showed it to not understand that they needed to tap the card. Learn from my mistakes – err towards “my 85-year-old grandma could navigate it” rather than “my photography friends will be so impressed.”
Additionally, ensure that your site is fully responsive, meaning it adapts seamlessly to different screen sizes. Nowadays, many themes and tools like Imagely and NextGEN Gallery are fully responsive. However, that’s not a given for every plugin or theme. Always check the tools you’re using and your final design to ensure your photographer website is mobile-friendly.
Key Takeaway
Focus on creating a user-friendly website that is easy to navigate and helps visitors find what they’re looking for, including less tech-savvy users. Prioritize responsiveness to ensure your photography site is accessible and user-friendly on all devices.
6. Create Stunning, Optimized Photo Galleries
Photo galleries are at the heart of photography websites, so it’s crucial to ensure they are optimized for both visual appeal and functionality.
Start by choosing a gallery layout that complements your style of photography. You’ll also want to think about where you’ll use galleries on your site. For example, a breathtaking homepage hero image along with a portfolio page might be perfect for wedding photography. Meanwhile, a sleek homepage masonry gallery to showcase a variety of client photos, like the Imagely theme template below, may work better for a headshot photographer.
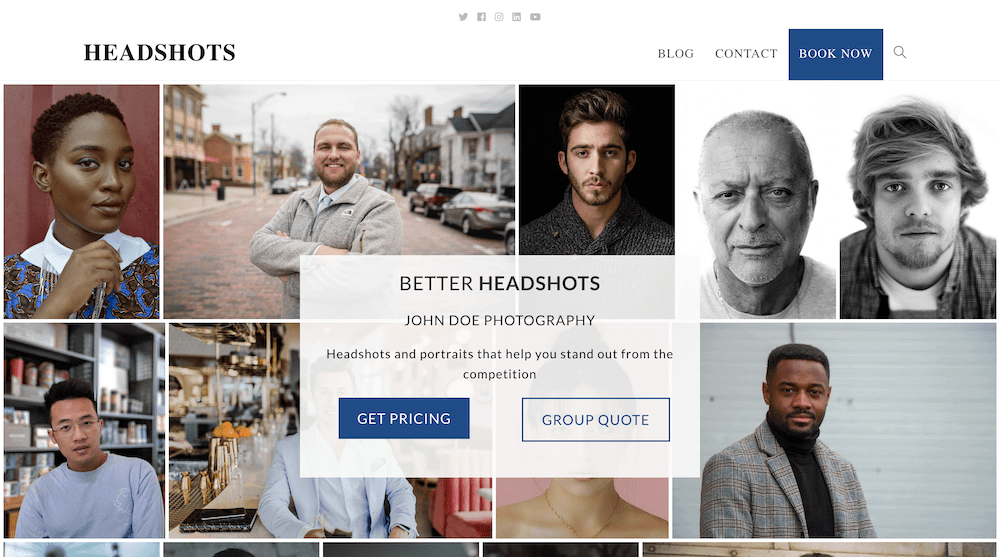
The goal is to present your images in a way that enhances their impact. In addition to choosing your portfolio layout, consider these photography website tips when displaying images:
- Quantity: Avoid overcrowding your galleries with too many images; instead, curate a selection of your best work to showcase your talent.
- Size: Optimize your images by balancing resolution with compression to ensure your photos are crisp, clear, and fast-loading.
- Organization: Organize and display multiple galleries in an album and use breadcrumbs to improve navigation.
- Functionality: Implement features like lightbox viewing, searchable categories, and a responsive design to ensure your galleries look great on all devices.
- SEO: Use descriptive file names, alt text, and captions for your images to create a better visitor experience and improve user search engine visibility. Stellar SEO is crucial for driving traffic to your site and getting more photography clients.
Key Takeaway
A photographer’s website design should prioritize photos and galleries. Choose an excellent layout, curate your images, implement user-friendly enhancements, and optimize your images and galleries for speed and SEO.
7. Avoid Common Mistakes & Regularly Update Your Site
The best photography website design can still fall short if the site contains errors. Broken links, misspelled words, and poorly labeled images can make your site appear unprofessional. To avoid this, regularly check your site for any mistakes and make it a habit to proofread your content.
Label your photographs clearly, avoid generic file names, and use descriptive captions. You should also regularly check that all links work as intended. You can use a tool like AIOSEO’s free Broken Link Checker to automatically scan your site for 404 errors. These small details can make a big difference in how visitors perceive your site and your professionalism as a photographer.
Lastly, remember that your portfolio site isn’t a one-and-done project. Once you’ve learned how to design a photography website, it requires ongoing maintenance and updates. You’ll want to refine your site to ensure it continues to meet your goals, your audience’s needs, and current standards for photography web design. Regularly review your site’s performance, update your portfolio with new work, and tweak your design when needed to keep it fresh and relevant.
Key Takeaway
- Regularly audit your site for errors such as broken links, misspelled words, and unclear image labels.
- Complete ongoing updates and reviews of your site’s performance, content, and design to meet your audience’s needs and stay current with web design best practices.
8. Leverage the Power of NextGEN Gallery
When displaying your photography online, the right tools can make all the difference. With over 32 million downloads, NextGEN Gallery is a powerful WordPress plugin designed specifically for photographers.
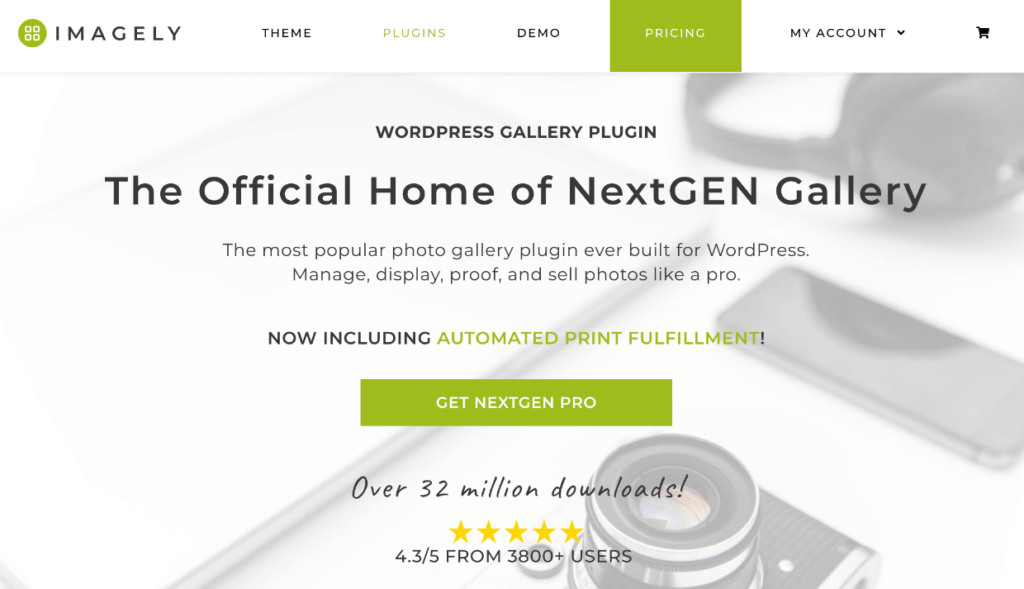
The plugin has many customizable gallery layouts like mosaic, masonry, tiled, blogroll, and more, making it easy to build beautiful, responsive galleries. Plus, it’s packed with powerful features for photographers and visual artists, such as:
- eCommerce options to sell digital downloads and prints with automated print fulfillment
- Client proofing
- Adobe Lightroom integration to create and manage WordPress galleries straight from Lightroom
- Deep linking for better SEO
- Filterable galleries and albums with front-end search functionality
- Image protection and built-in watermarking
- Social sharing and image commenting
- Image optimization with automatic resizing and lazy loading
- Gallery animations and hover captions
- And more!
The plugin also integrates seamlessly with the Imagely theme, or you can use it with your own theme. Whether displaying a few simple galleries or needing a full-featured solution to display and sell your work, NextGEN Gallery has you covered.
Designing a photography website that effectively showcases your work and attracts clients is no small feat, but with the right approach, it’s entirely achievable. By following these photography web page design tips, leveraging Imagely’s tools, and regularly performing updates, you can ensure your website remains an effective tool for attracting clients and showcasing your photos.
Want to learn more about building websites for photographers? Check out these resources:
- How to Create a Photography Website on WordPress
- 10 Mistakes to Avoid When Building a Photography Website
- Photography Website Builders Compared: How to Choose a Website Builder
- How to Migrate a Squarespace Photography Website to WordPress
We hope you found our design tips for a photographer website helpful! Be sure to also check out 12 Key Photography Skills to Unlock Your Creative Potential.
Don’t have NextGEN Gallery yet? Get started today!
For more photography tips and WordPress tutorials, check out our blog.


